Enroll/Drop Student to/from Class Individually
This function allows ther users to enrol/drop student to/from their class individually.
Enroll Student to Class
Roles Involved: School Student Registrar
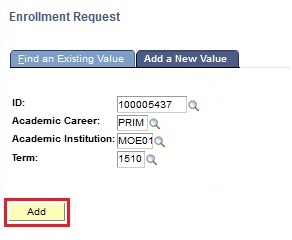
Navigate to Main Menu > Records and Enrollment > Enroll Students > Enrollment Request.
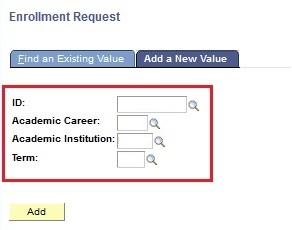
User will be directed to Enrollment Request’s Add a New Value page.
Enter the student’s ID (EMPLID), Academic Career and Term.

Click on the Add button.
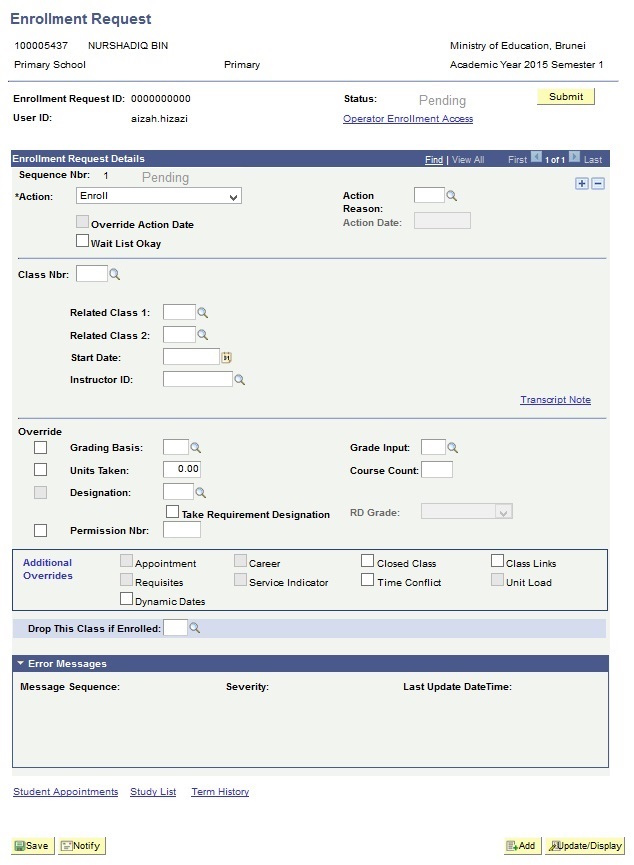
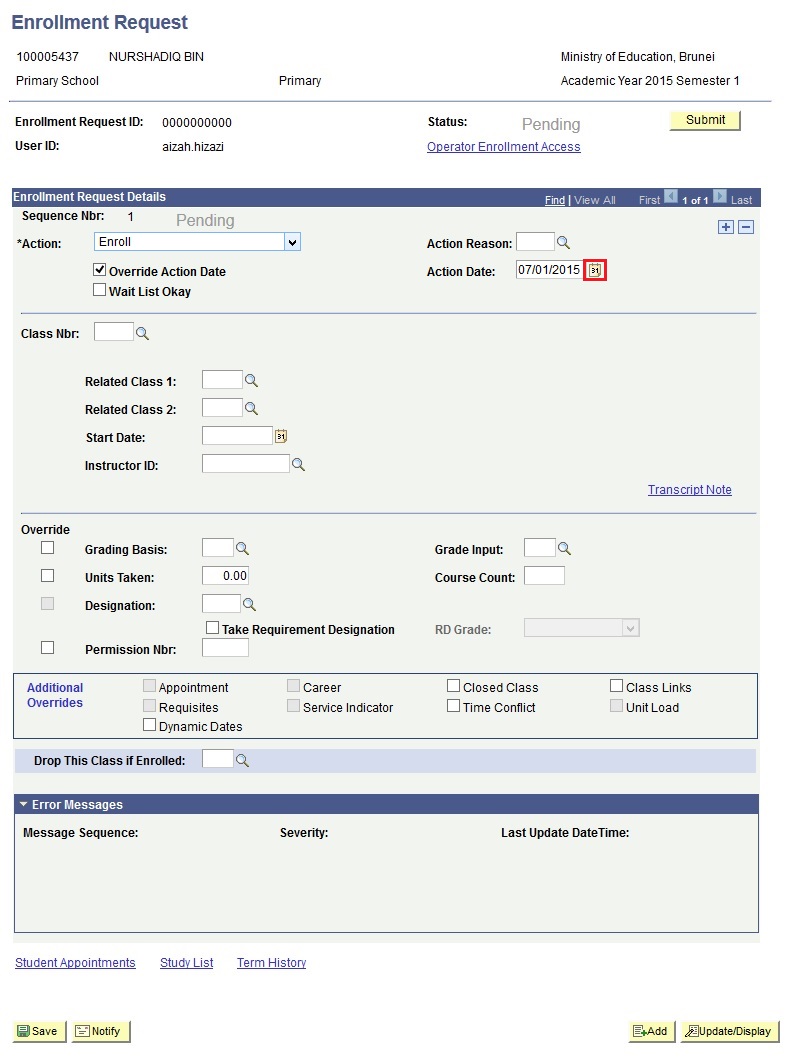
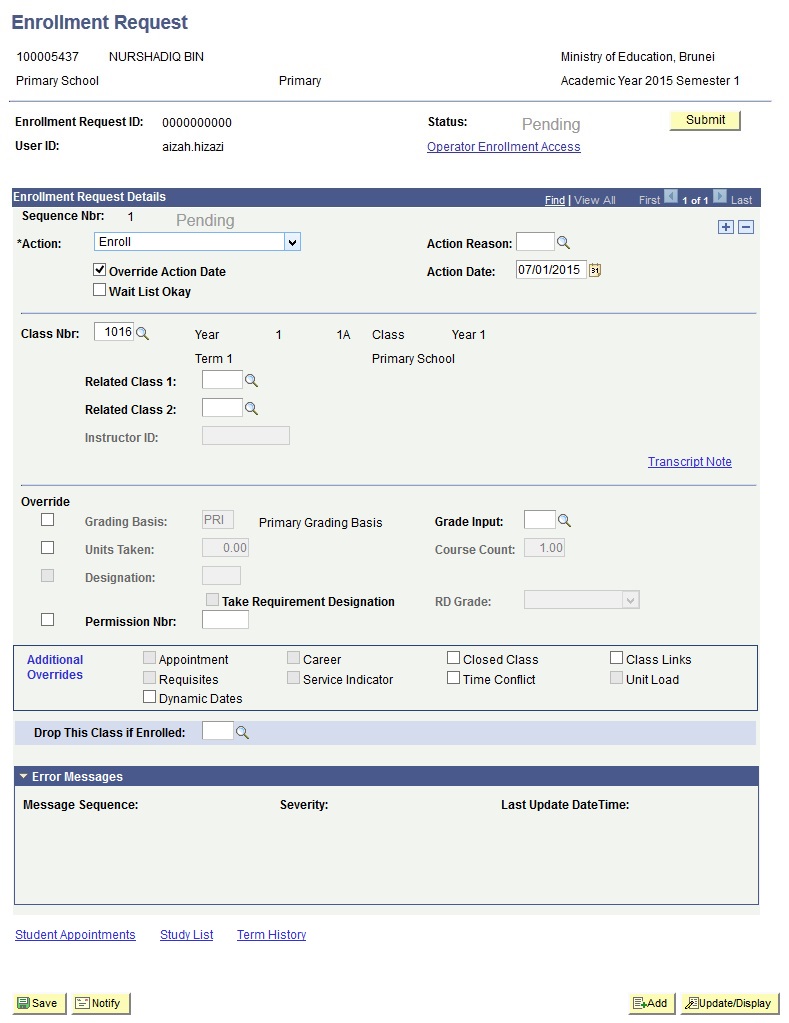
User will be directed to the Enrollment Request page.
Click on the dropdown list to view the list of Action.
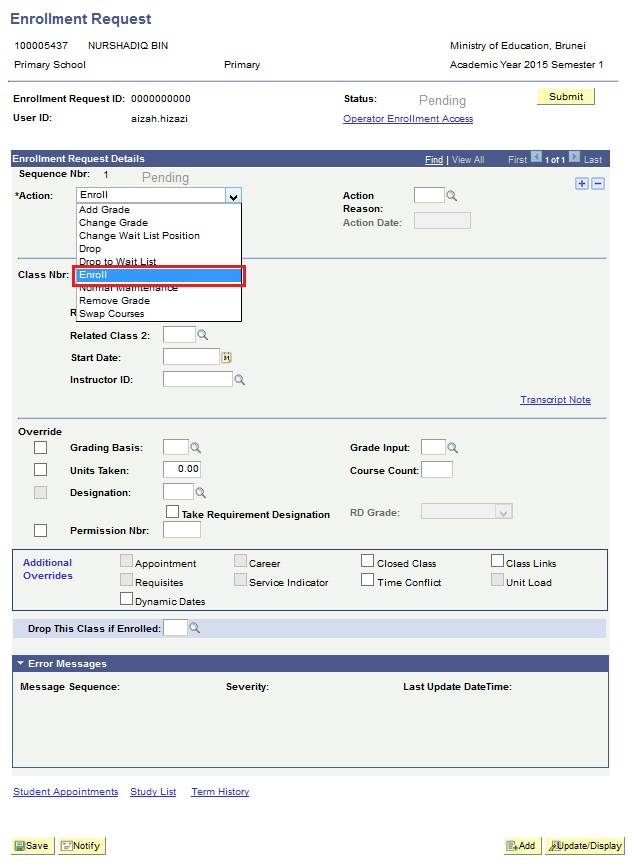
Select Enroll to enrol students into a class.
Check the Override Action Date box.
Click on the Calendar icon and select the Action Date.
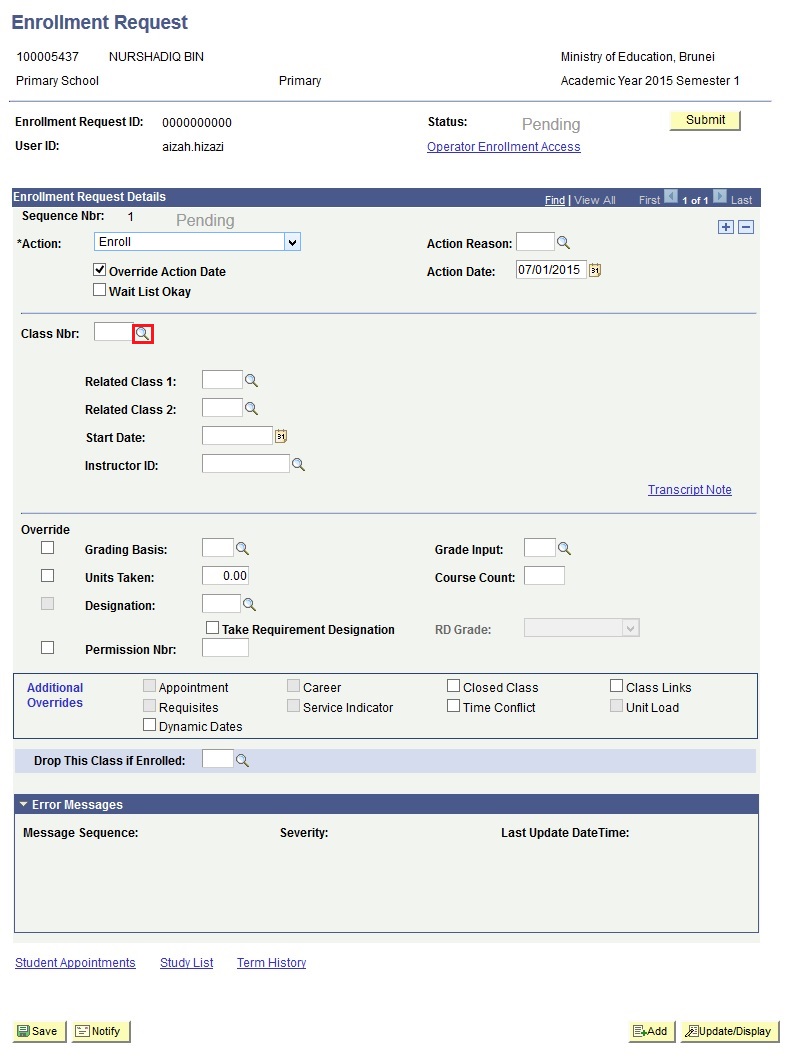
Click on the look-up button of Class Nbr to search for the class.
User will be directed to Search for Classes page.
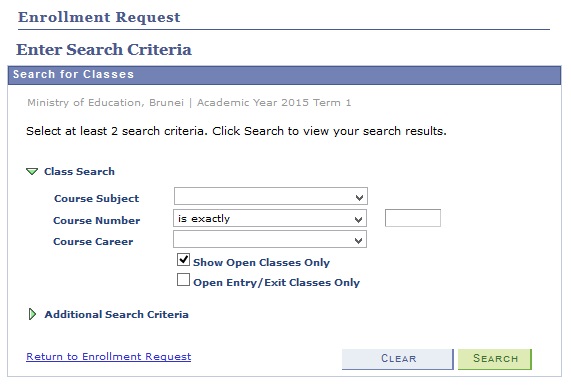
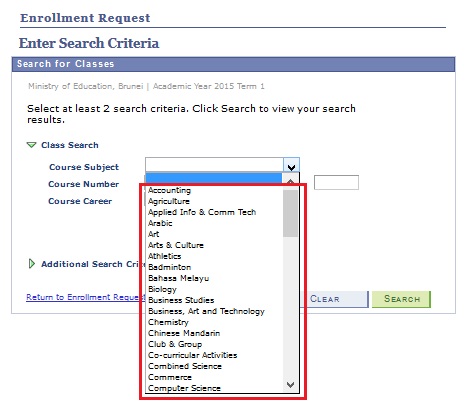
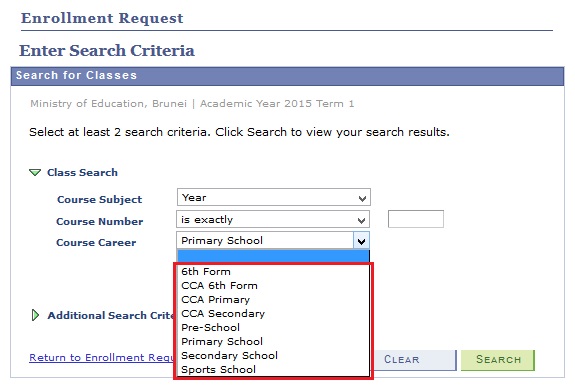
Click on the dropdown button and select the Course Subject.
Click on the dropdown list and select the Course Career.
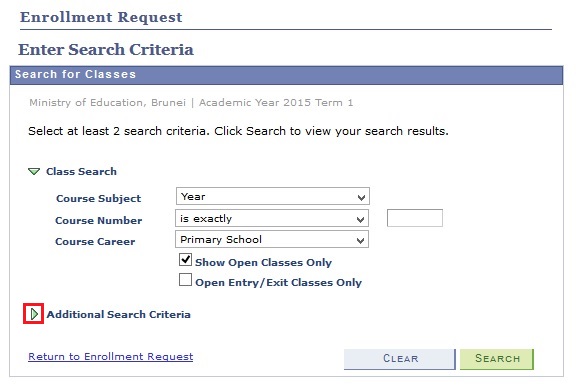
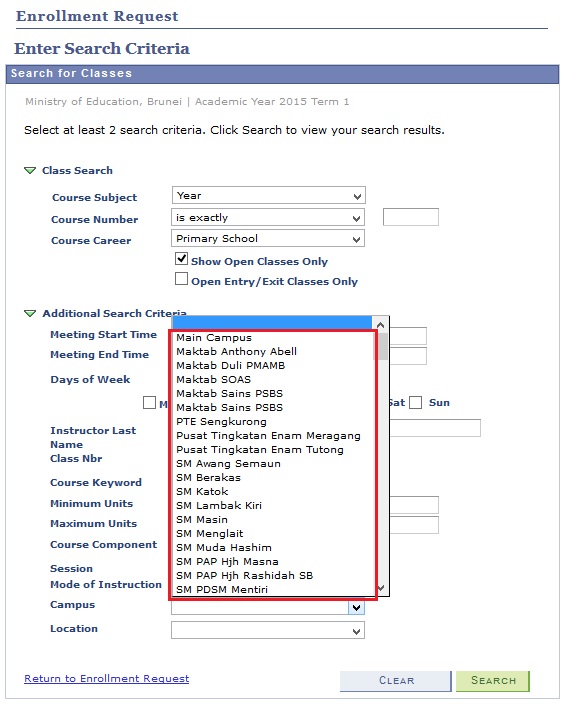
Click on the green arrow next to Additional Search Criteria.
Click on the dropdown list and select the Campus.
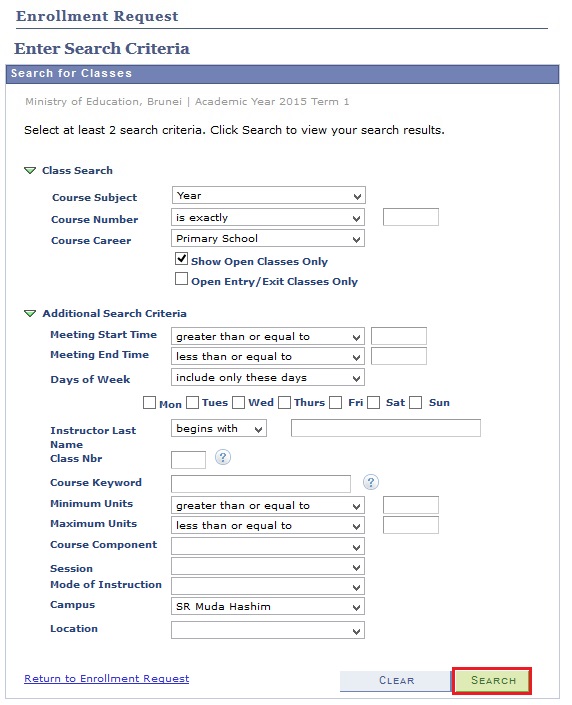
Click on the Search button.
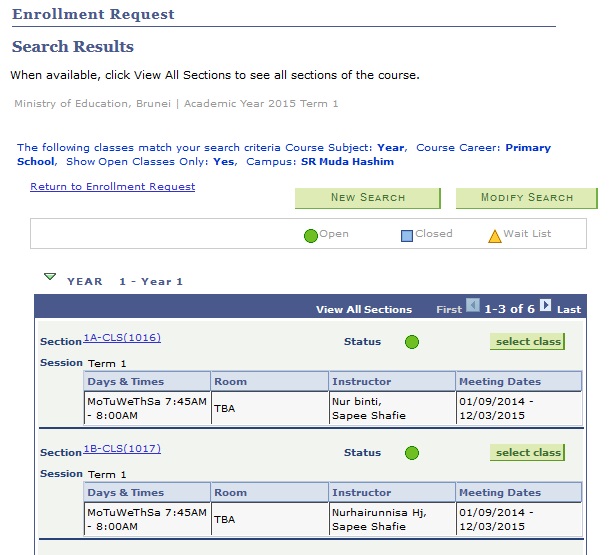
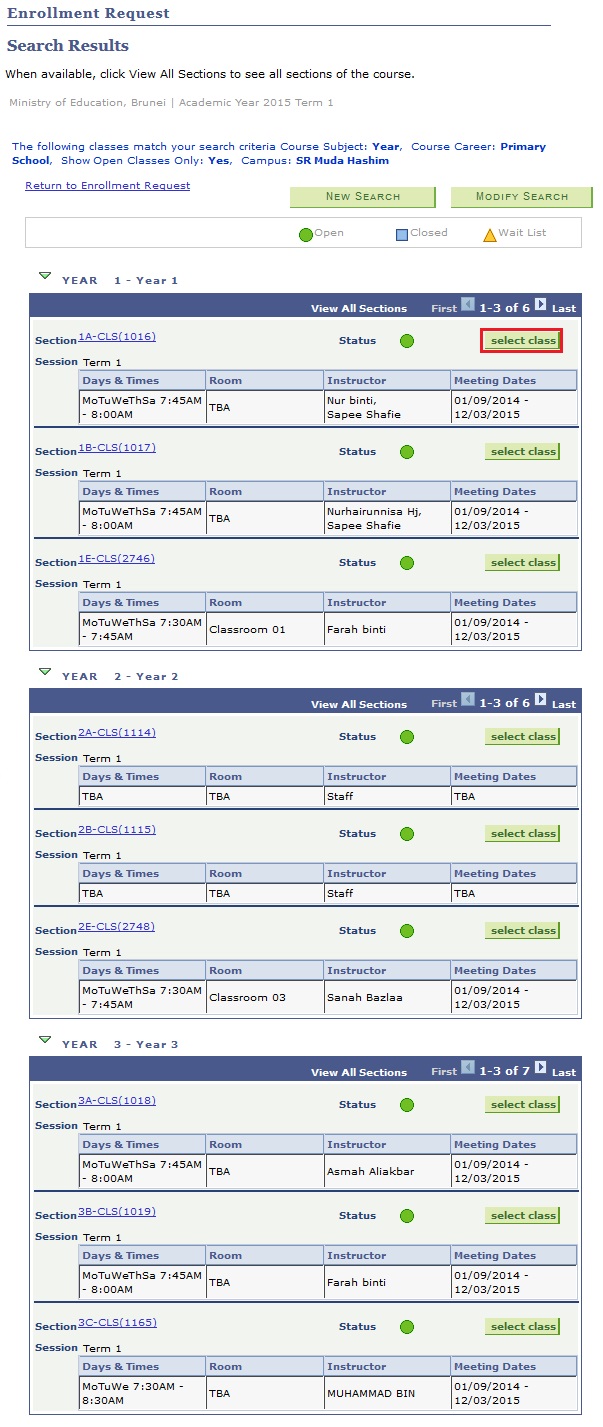
User will be directed to the Search Result page.
Click on the Select Class button to the right of the Class Section the user wish to enrol the student into.
User will be directed back to the Enrollment Request page.
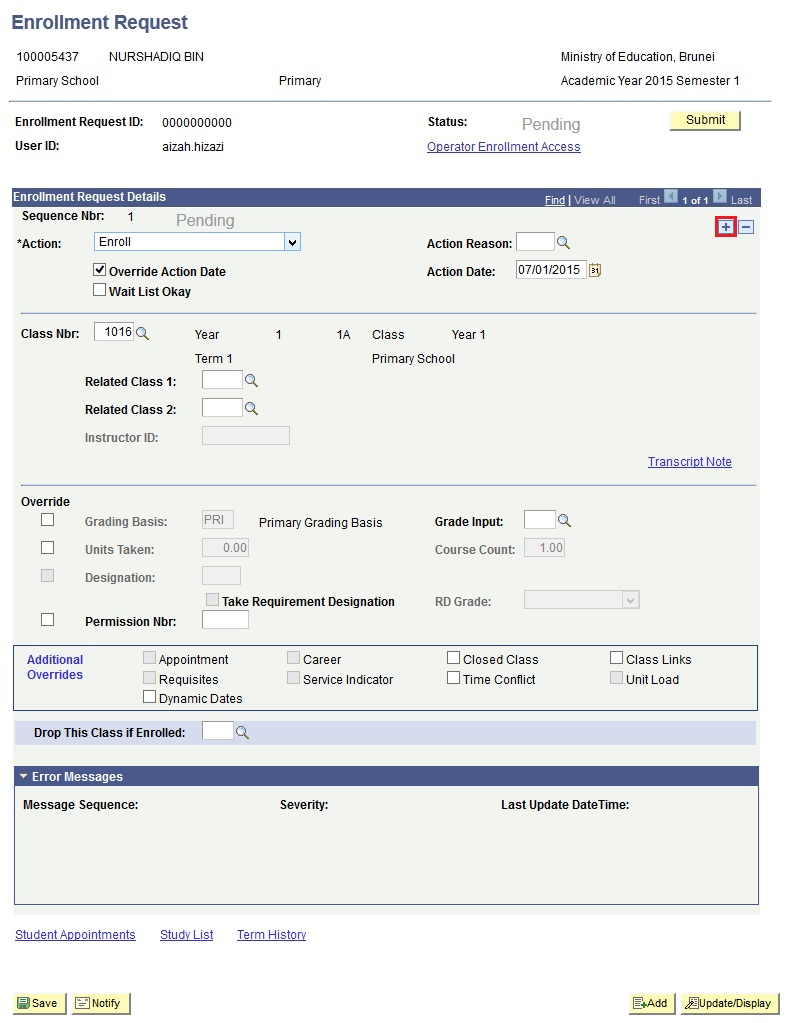
Click on the “+” button to enrol student into more subject classes.
Repeat step 6 - 20.
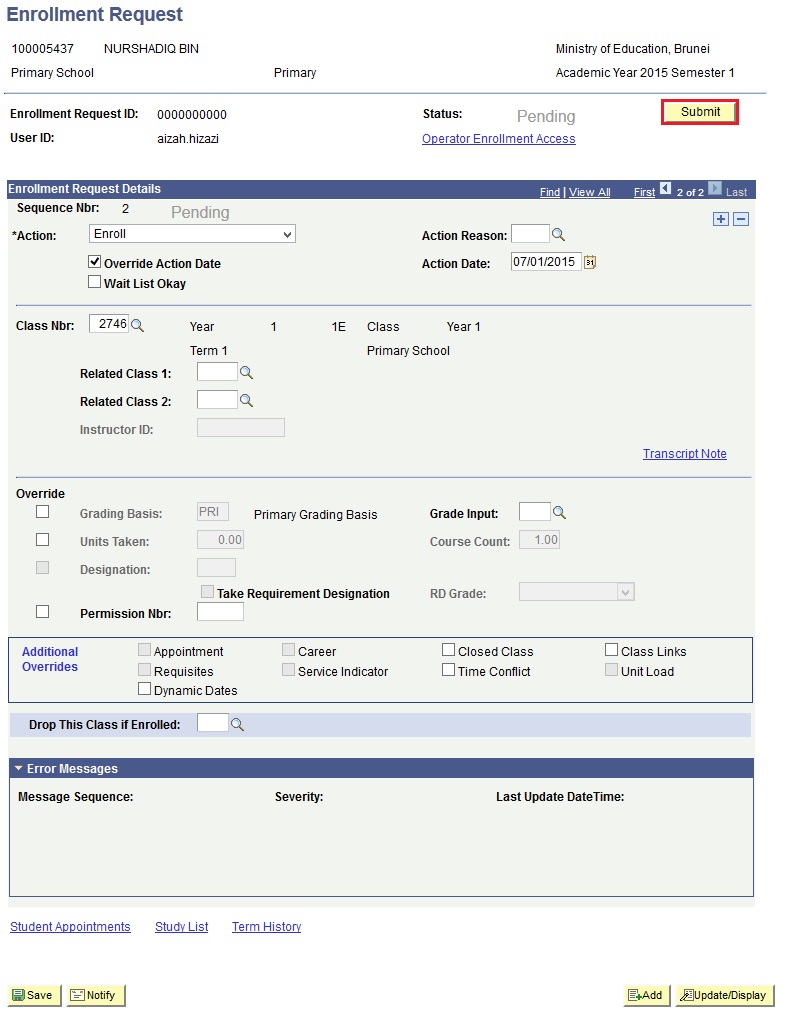
When user has added all the subject classes, click on the Submit button.
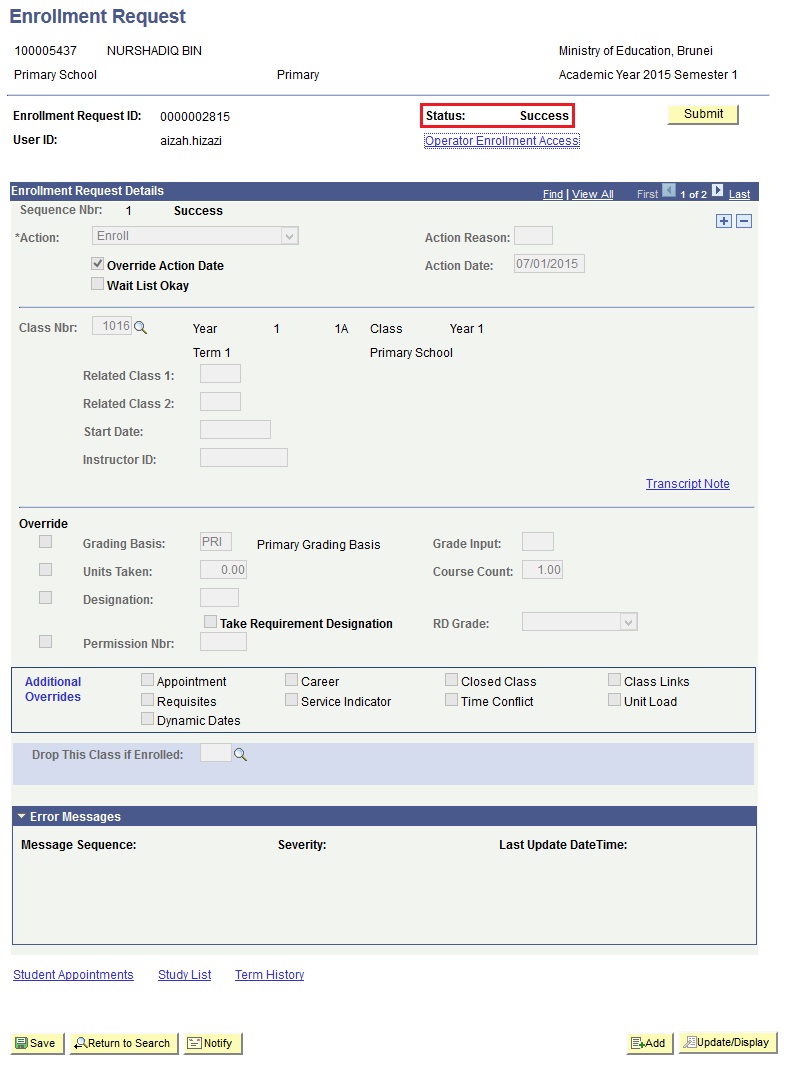
Verify that the Status of the enrollment is a Success to ensure student has been successfully enrolled into classes.
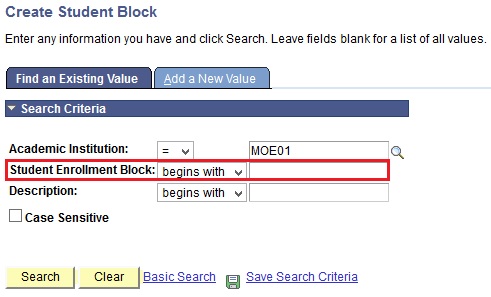
Navigate to Main Menu > Records and Enrollment > Enroll Students > Block Enrollment > Create Student Block.
User will be directed to Create Student Block, Find an Existing Value page.
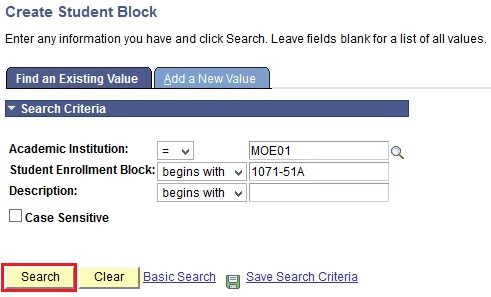
Enter the existing Student Enrollment Block where the student should be in.
Click on Search button.
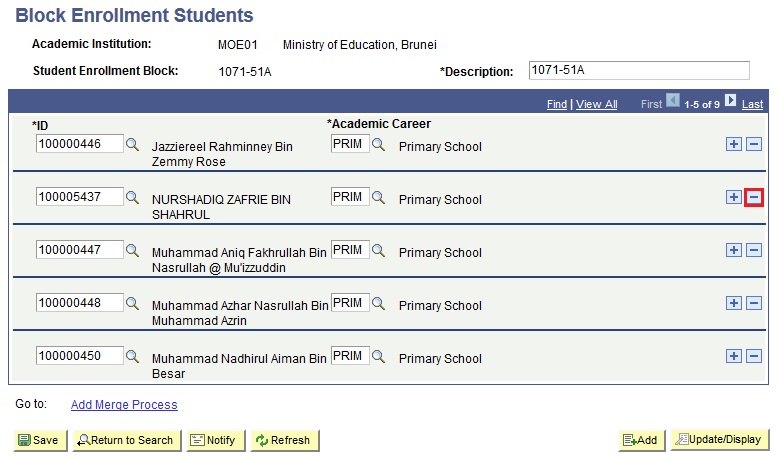
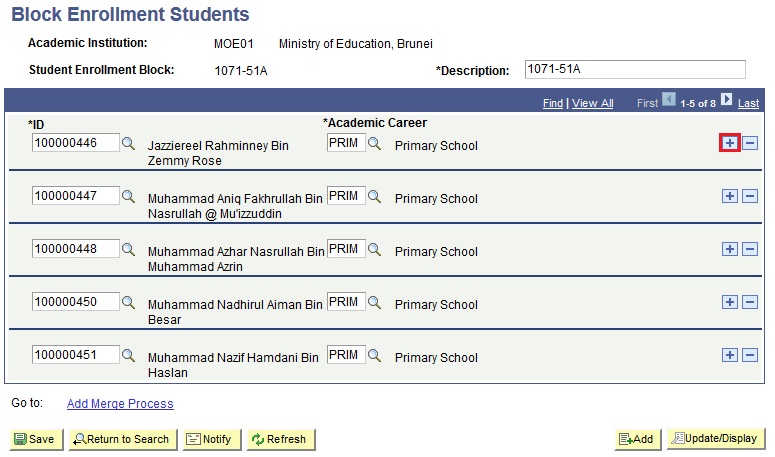
User will be directed to the Block Enrollment Students page.
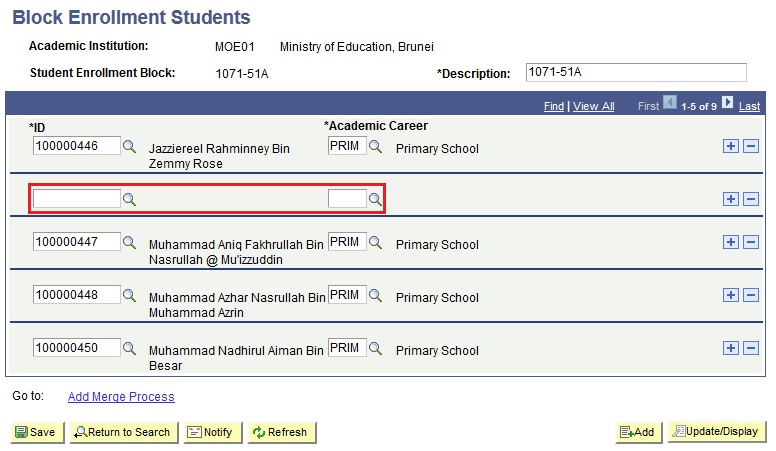
Click on the “+” button to add the student into the Student Enrollment Block.
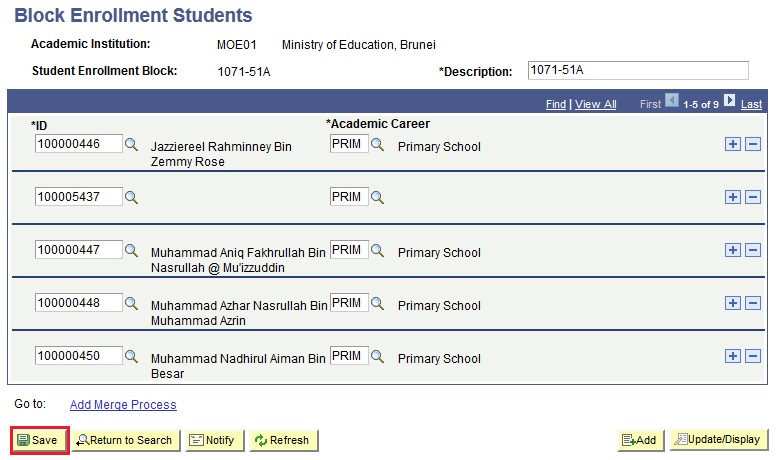
Enter the Student ID and Academic Career.
Click on Save button.
Note: Action Date is the date when the student enter the school.
Note:
Take note of the Class Nbr as user will need it to search in the Class Roster
Note:
Ensure class schedule does not clash.
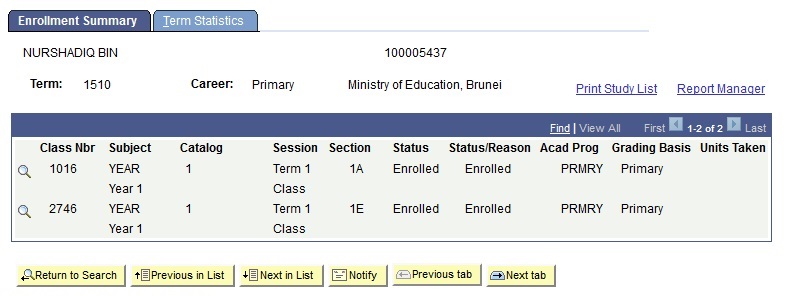
Verify Enrollment Summary
Roles Involved: School Student Registrar
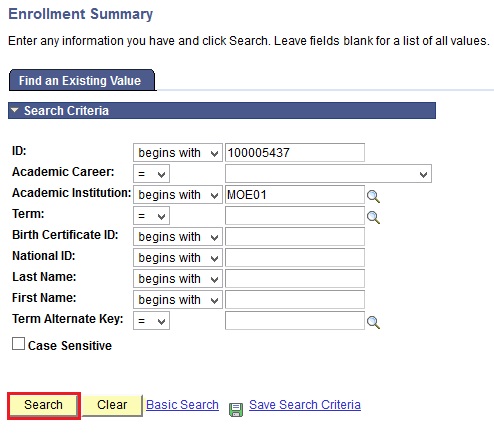
Navigate to Main Menu > Records and enrollment > enrollment Summaries > Enrollment Summary.
Search for a particular student by entering the Birth Certificate ID, National ID, or ID (EMPLID).
Click on the Search button.
Verify the student’s Enrollment Summary.
↑ Back to Top

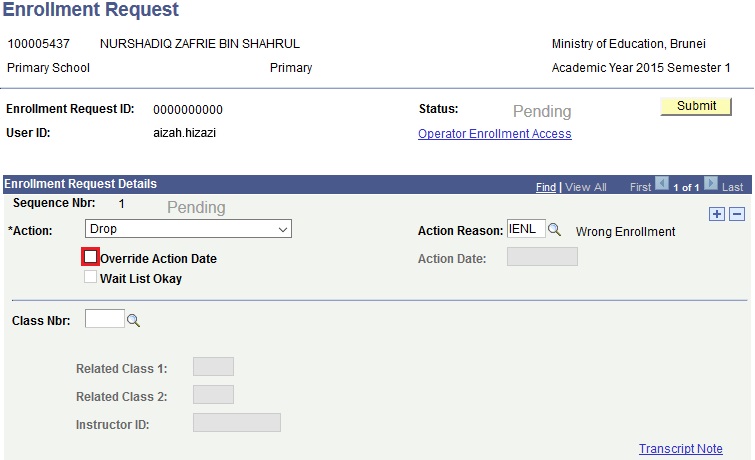
Drop Student from Class
Roles Involved: School Student Registrar
Navigate to Main Menu > Records and Enrollment > Enroll Students > Enrollment Request.
User will be directed to Enrollment Request’s Add a New Value page.
Enter the student’s ID (EMPLID), Academic Career and Term.
Click on the Add button.
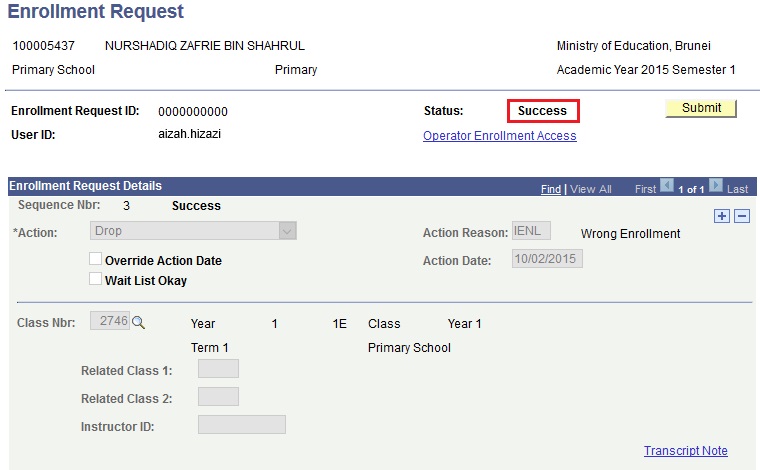
User will be directed to the Enrollment Request page.
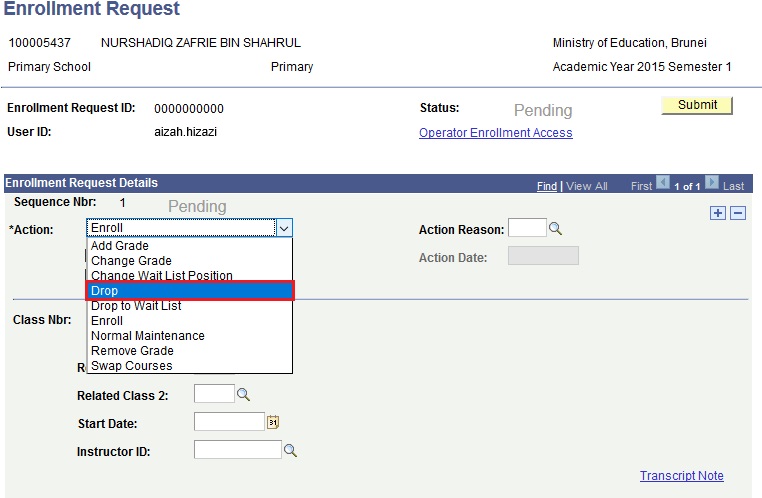
Click on the dropdown list to view the list of Action.
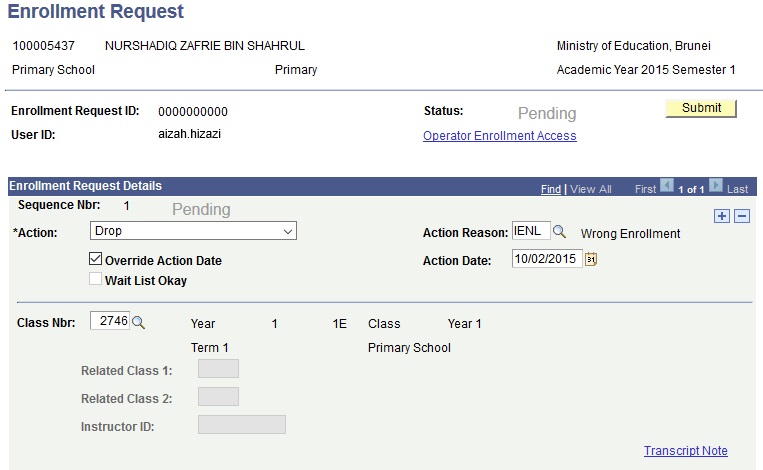
Select Drop from drop down list to drop student from a class.
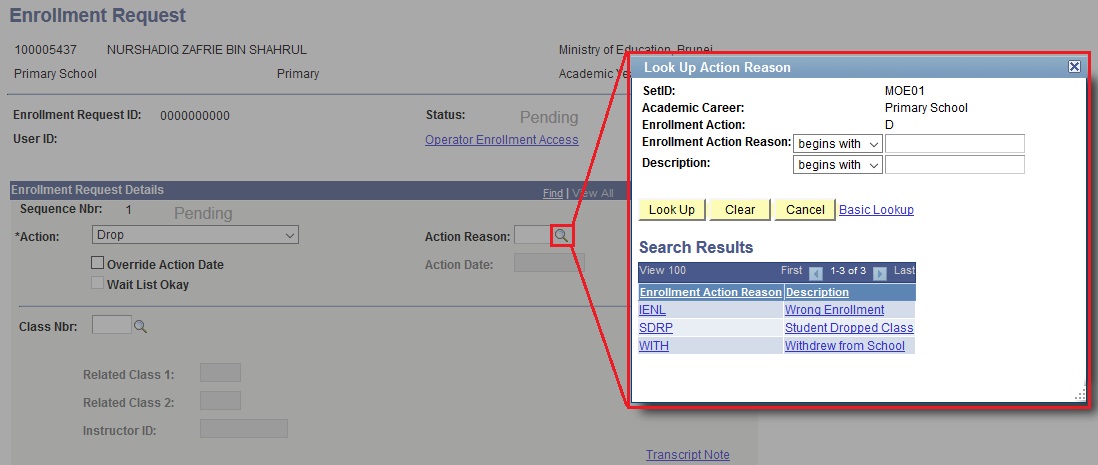
Click on the look-up button of Action Reason to select reason student is dropped from class.
- IENL – Wrong Enrollment (Student enrolled into wrong class hence attendance taken in the wrong class will be removed from attendance roster)
- SDRP - Student Dropped Class (Student transfer class/school hence attendance of the student will remain in the attendance roster)
- WITH – Withdrew from School (Student withdrawn from school hence attendance of the student will remain in the attendance roster)
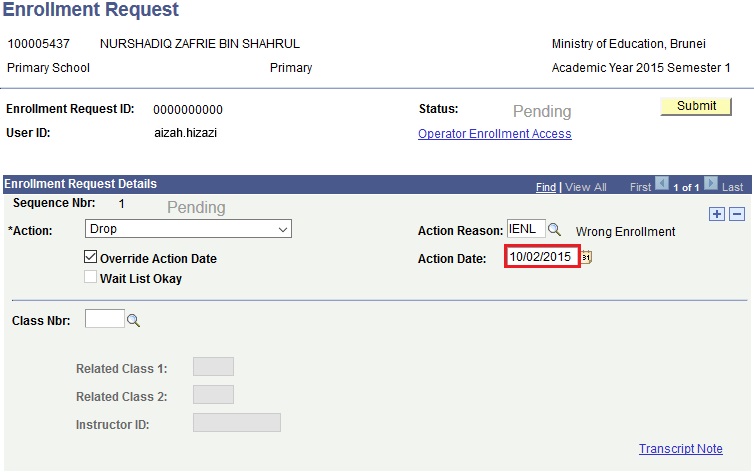
Check the Override Action Date box.
Enter the Action Date as of when the student drop from class.
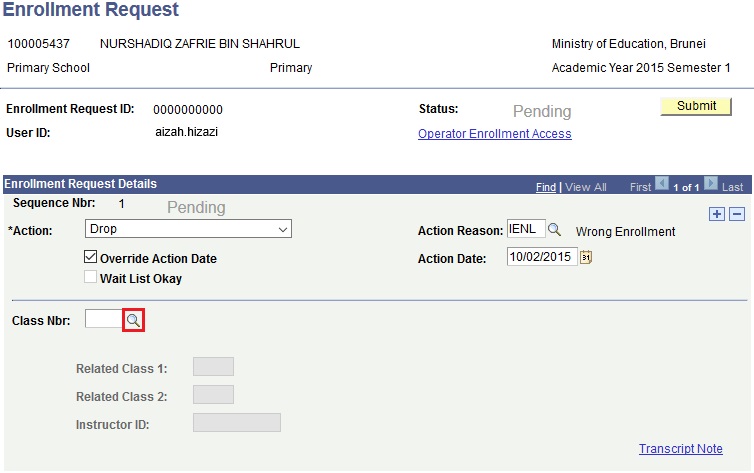
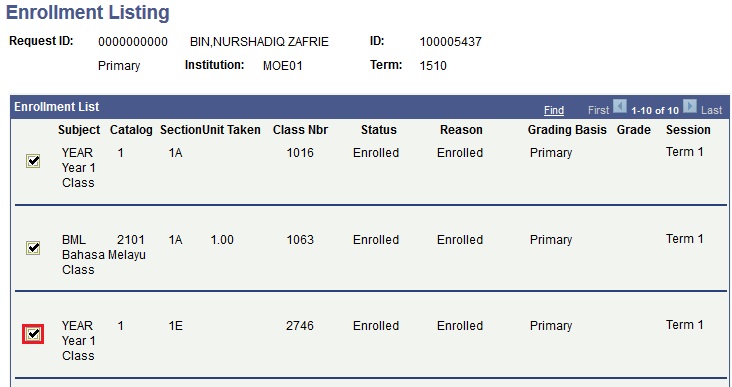
Click on the look-up button of Class Nbr to search for the class to drop.
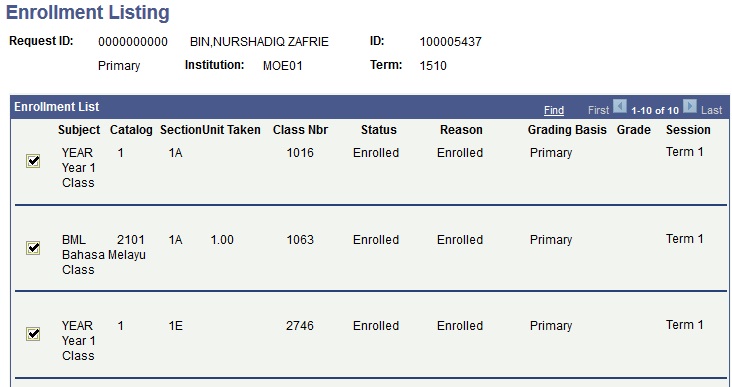
User will be directed to the Enrollment Listing page.
Select the Class user wish to drop the student from.
User will be directed back to the Enrollment Request page.
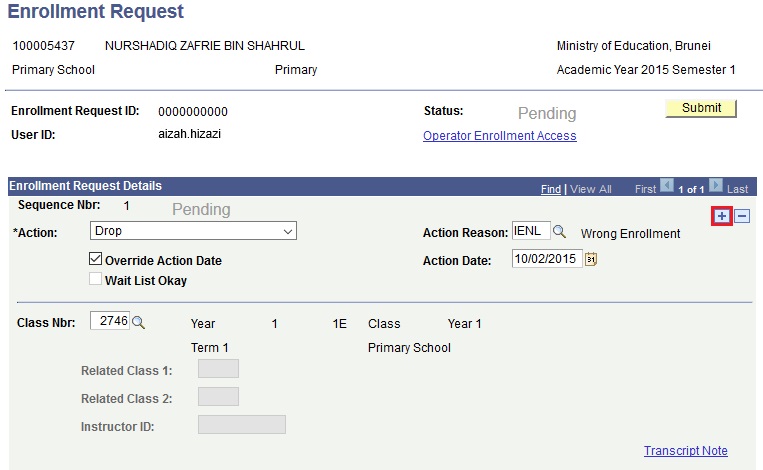
Click on the “+” button to drop student from more classes.
Repeat step 6 - 13
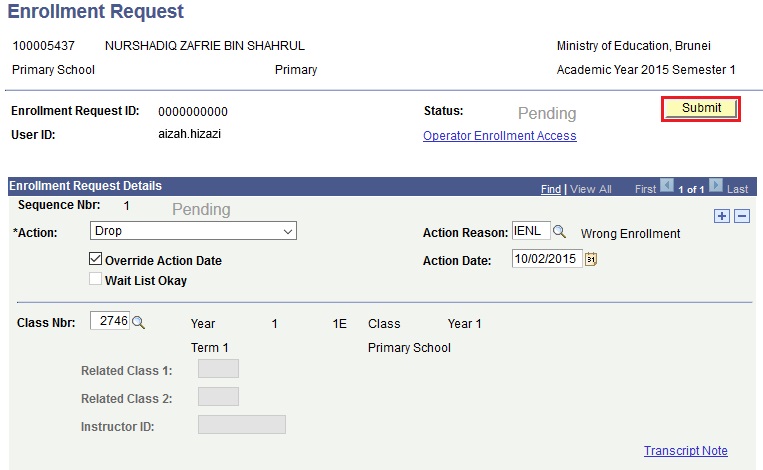
When the user is done selecting the Class Sections to drop the student from, click on the Submit button.
Verify that the Status of the drop of classes is a Success to indicate that student was successfully dropped from class.
Verify the student’s Enrollment Summary by following the steps from Verify Enrollment Summary section.
Navigate to Main Menu > Records and Enrollment > Enroll Students > Block Enrollment > Create Student Block.
User will be directed to Create Student Block, Find an Existing Value page.
Enter the existing Student Enrollment Block where the student should be in.
Click on Search button.
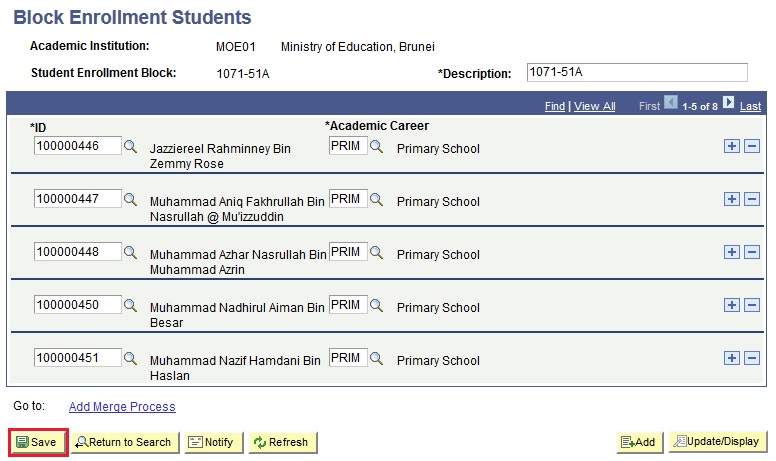
User will be directed to the Block Enrollment Students page.
Click on the “-” button to add the student into the Student Enrollment Block.
The Delete Confirmation box will appear. Click on the OK button.
Click on Save button.
Note: