Update the Student Records of the students returning from Deferment/LOA
This function allows the users to update the Student Records.
Update Student Program / Plan
Role Involved: School Student Registrar (MOE_SCHL_STDNT_REGISTRAR)
Navigate to Main Menu > Records and Enrollment > Career and Program Information > Student Program/Plan.
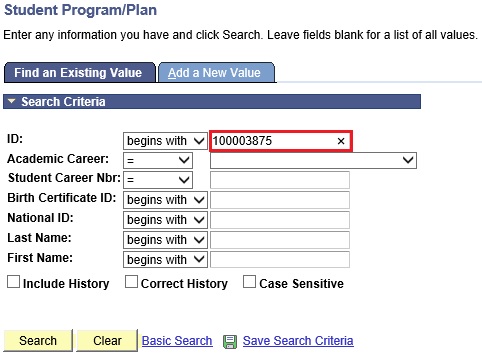
To find the existing Student Program/Plan, click on the Find an Existing Value tab.

Enter the Student ID of the student who is returning back to school in the ID field
Select 'Include History' checkbox when searching.
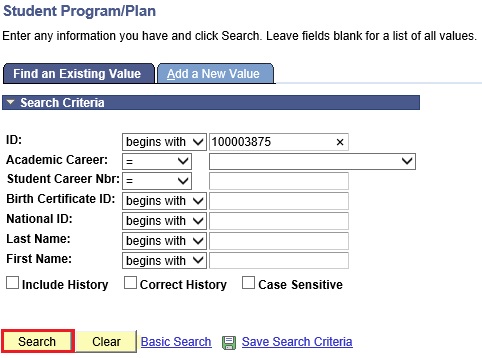
Click on the Search button.
User will be directed to the Student Program/Plan page.
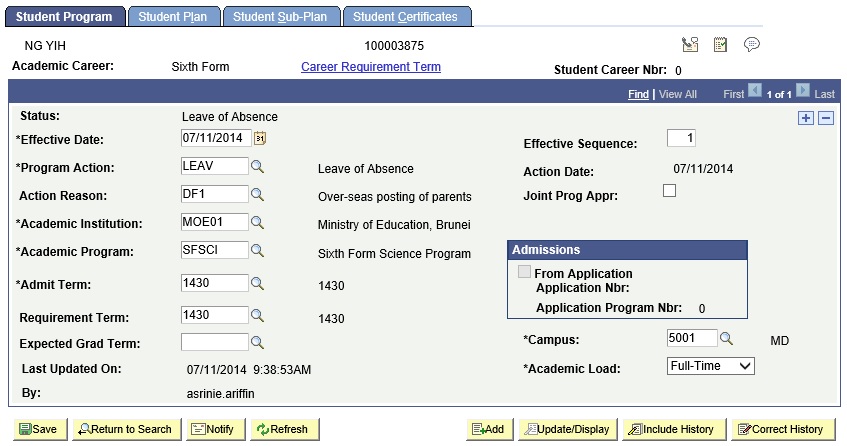
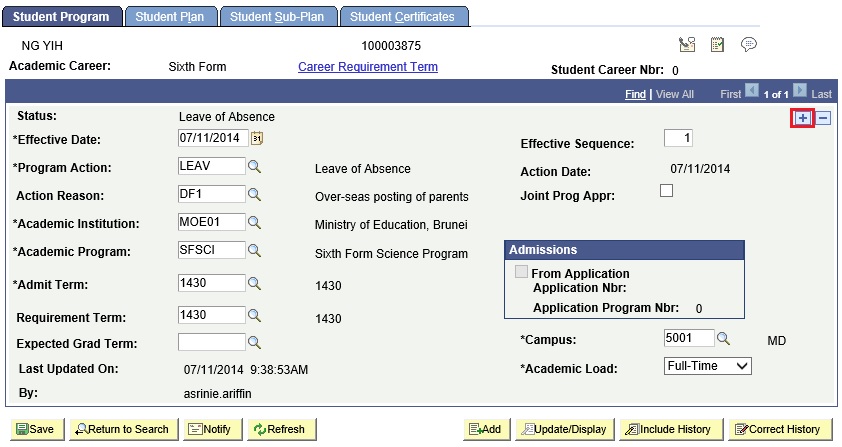
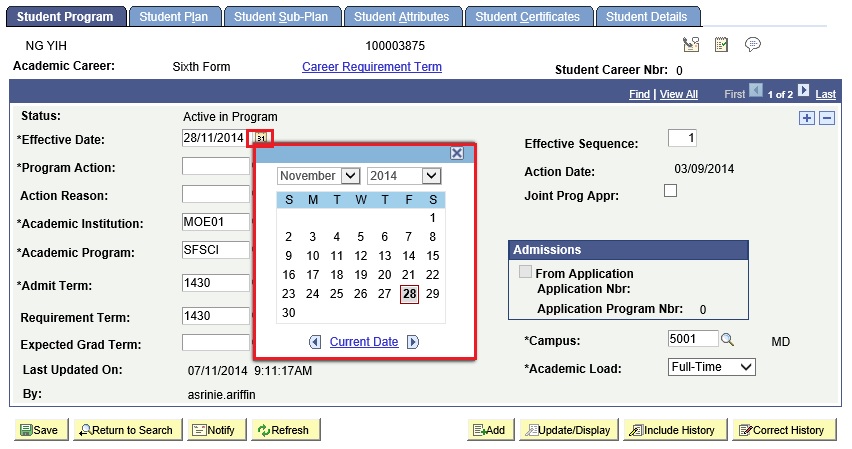
On the Student Program tab, click on the ‘+’ icon button to enter the Return from LOA records.
Click the Calendar icon to select the date from which the student will return back to school.
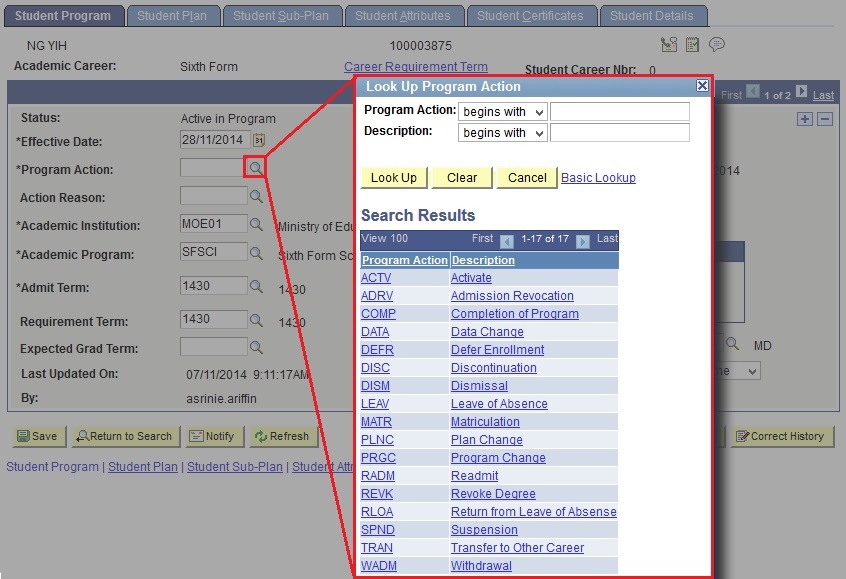
Click the Program Action lookup icon then select the ‘RLOA’ – Return from LOA.
Click on the Save button to save the record.


Note:
If the student returns after the current Academic Year is over, then after the Student Program/Plan is updated with ‘RLOA’ – Return from Leave of Absence record, Progression or Retention should be done for the student by adding another new record Program Action with ‘PRGC’ – Program Change or ‘PLNC’ – Plan Change for Progression, and ‘DATA’ – Data Change for Retention.
If the Deferred/LOA student does not return back to school at the end of the Deferment/LOA period, after verifying that the student will not return back to school, the Student Program/Plan record should be updated with a new record with Program Action ‘DISC’ – Discontinuation to show that this student has discontinued his studies.
Note:↑ Back to Top
After saving the first record, the user should make the same changes for the CCA Record of the Student.
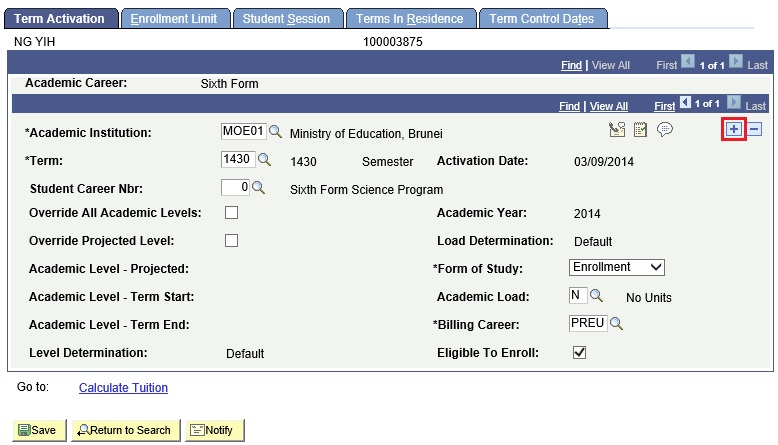
Term Activate the Student
Role Involved: School Student Registrar (MOE_SCHL_STDNT_REGISTRAR)
Term Activation should only be done if the student was Term Withdrawn previously because he/she is returning to school after a new Term has begun.
Navigate to Main Menu > Records and Enrollment > Student Term Information > Term Activate a Student.
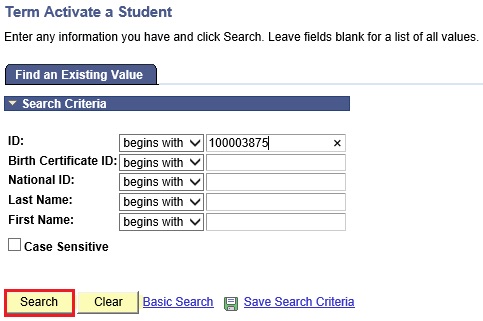
To find an existing term record for the student, click on the Find an Existing Value tab.
Enter the Student ID.
Click on the Search button.
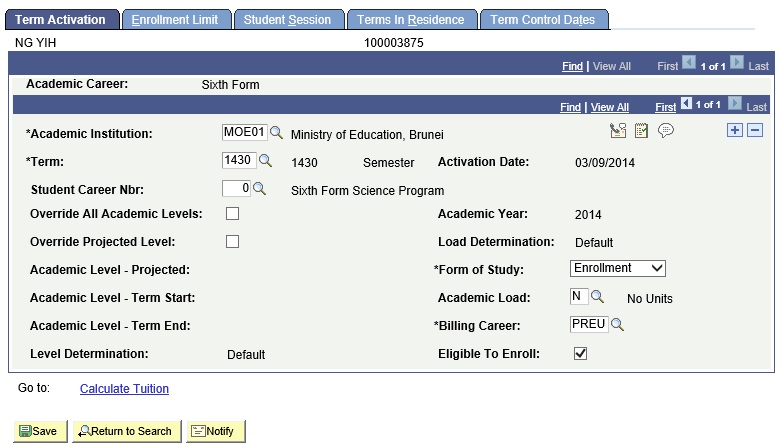
User will be directed to the Term Activation page.
On the Term Activation tab, click on the ‘+’ icon to enter a new record.
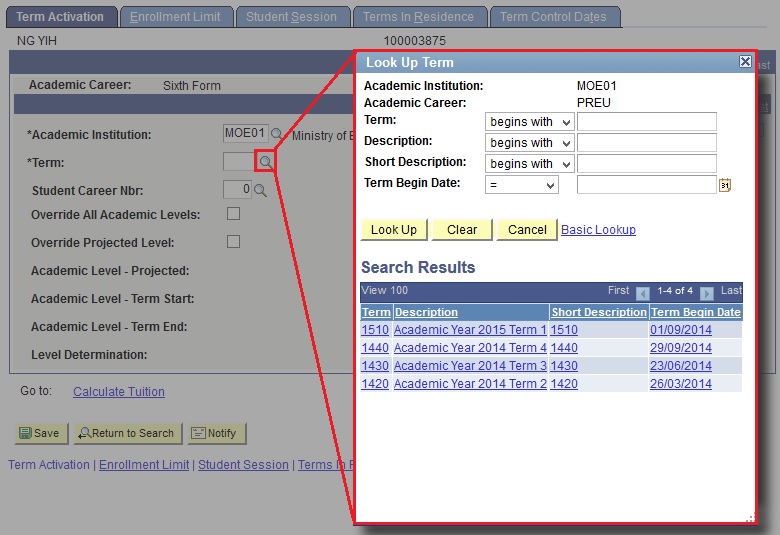
Click on the *Term lookup icon to select the term that the student is being activated for.
Click on the Save button to save the term activation record.


Enroll the Student in the Class
Role Involved: School Student Registrar (MOE_SCHL_STDNT_REGISTRAR)
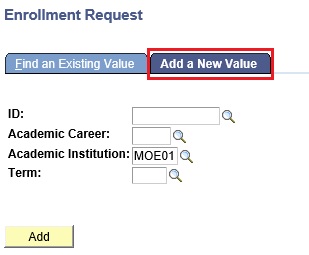
Navigate to Main Menu > Records and Enrollment > Enroll students >Enrollment Request.
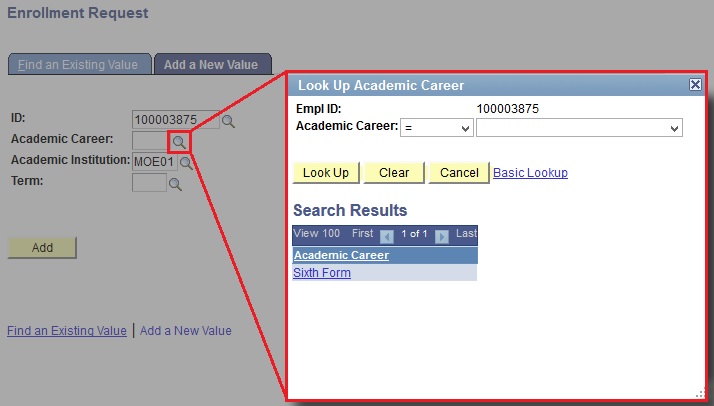
To enter a new request, click on the Add a New Value tab.
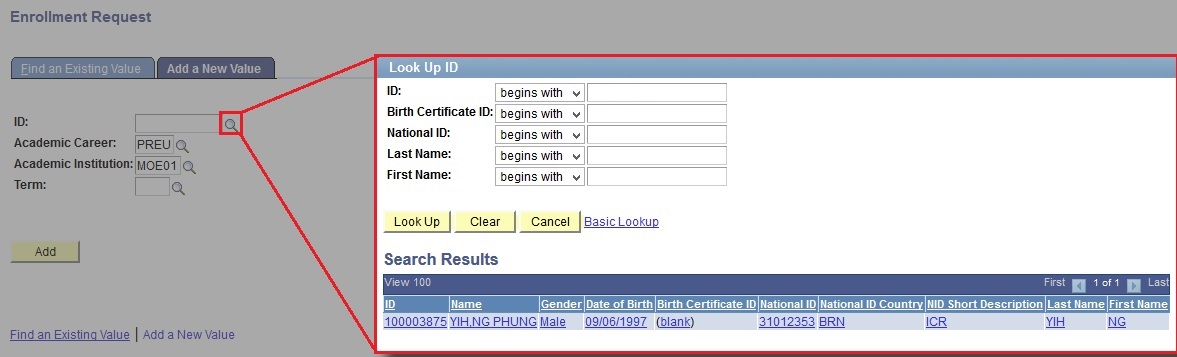
Click on the lookup icon to select the Student ID of the student who is returning back to school.
Click on the lookup icon to select the Academic Career of the student.
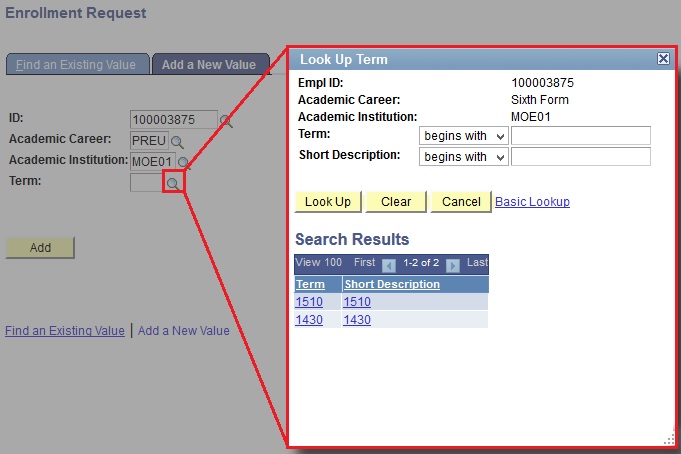
Click on the lookup icon to select the Term the student is returning back to school.
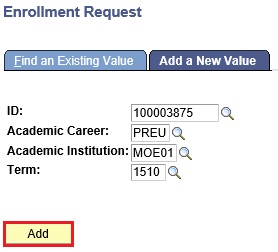
Click on the Add button.
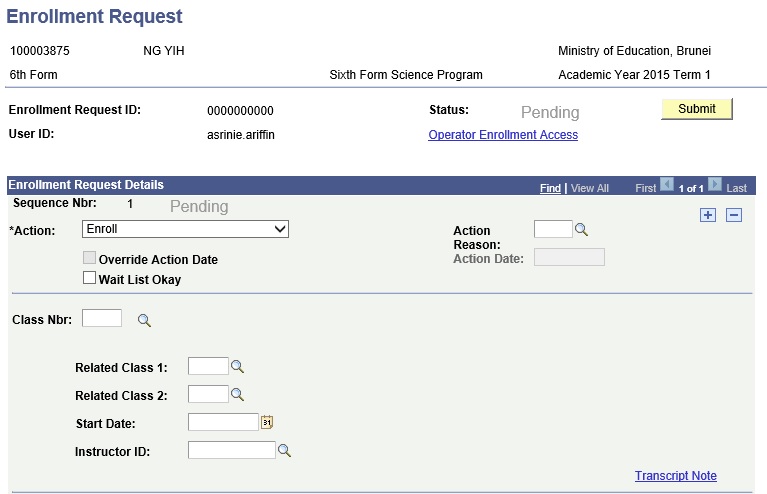
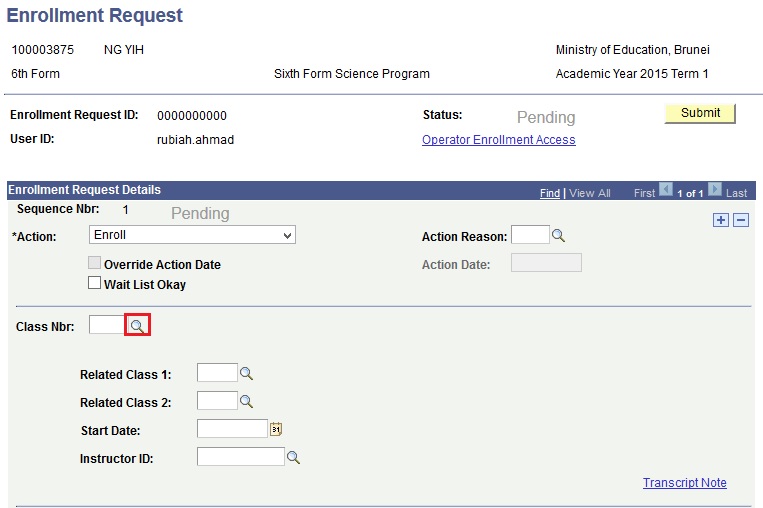
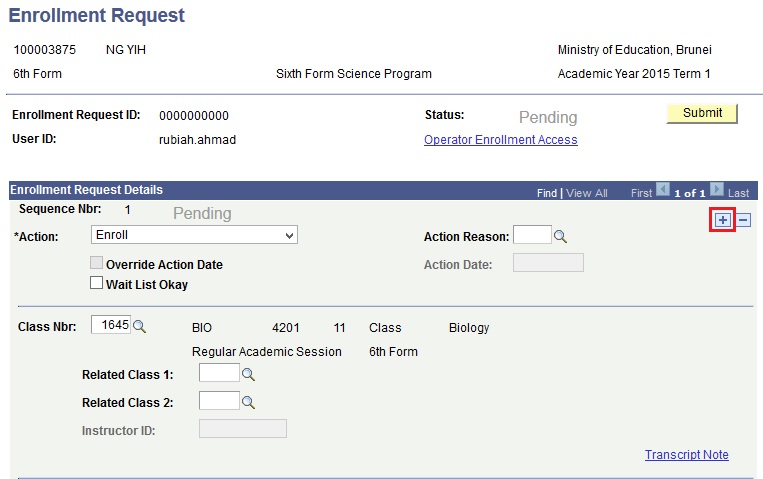
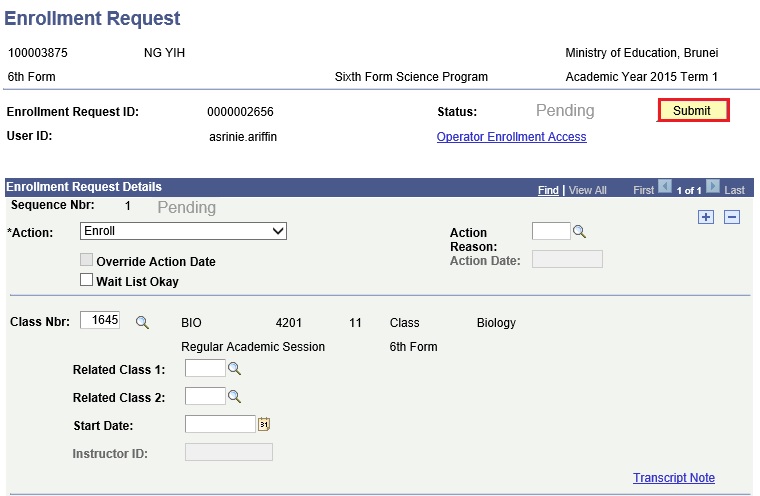
User will be directed to the Enrollment Request page.
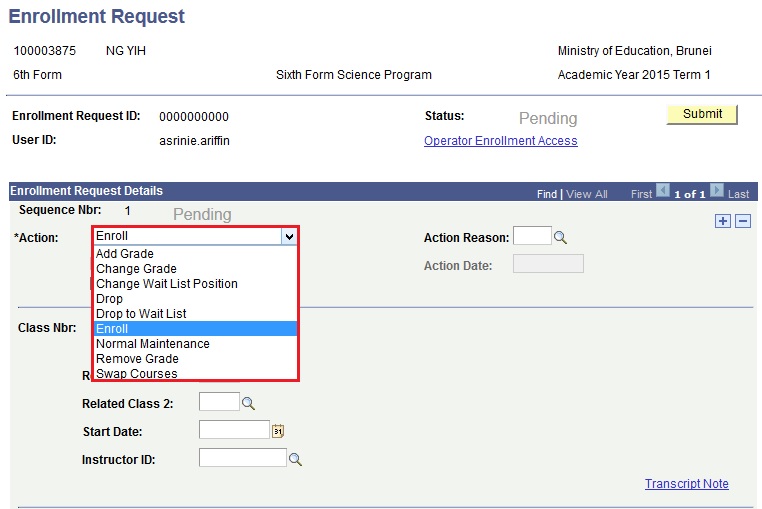
Select Enroll from the *Action dropdown.
Click on the lookup icon to select the Class Nbr of the classes the student should be enrolled in. The classes need to be searched one by one.
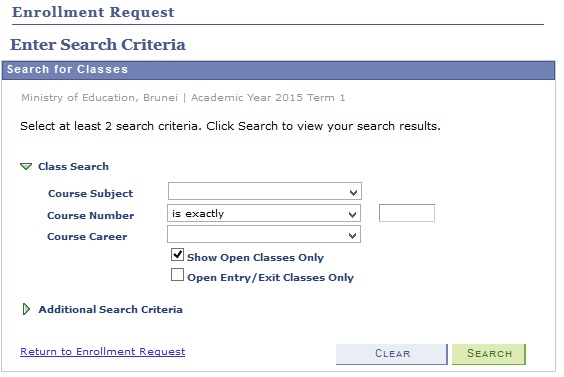
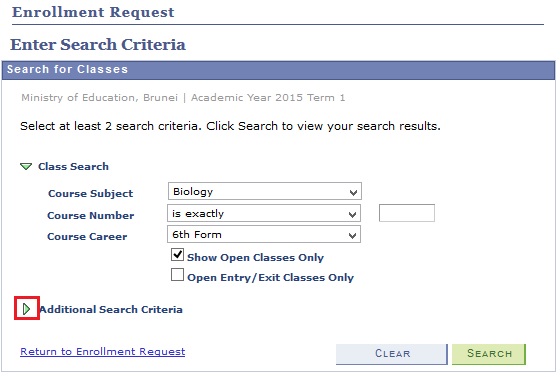
User will be directed to the Enrollment Request – Search Criteria page.
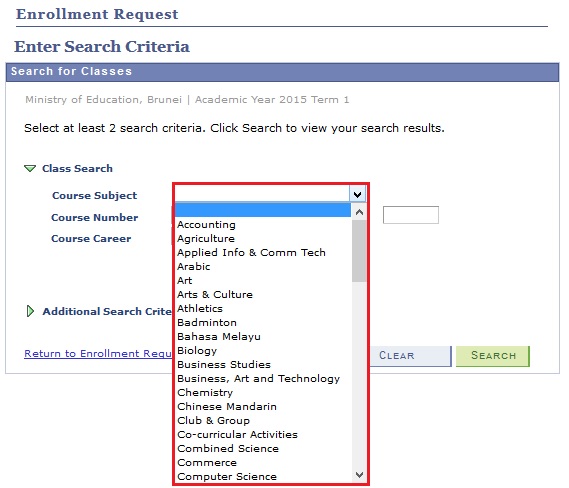
Select the Course Subject from the dropdown list. For the class section the Course Subject should be ‘YEAR’ and for the subject classes it should be the relevant subject.
Click the Course Career dropdown.
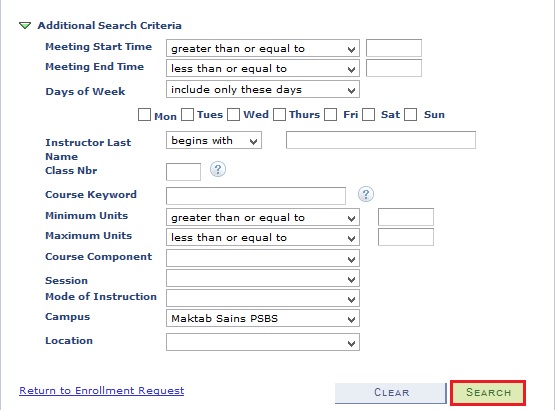
Click on the arrow head against Additional Search Criteria.
Scroll down to the Campus field and click on the dropdown to select the campus/school of the user.
Click on the Search button.
Select the Class the student is going to be enrolled in, click on the Select Class button.
To add other classes, click on the ‘+’ icon.
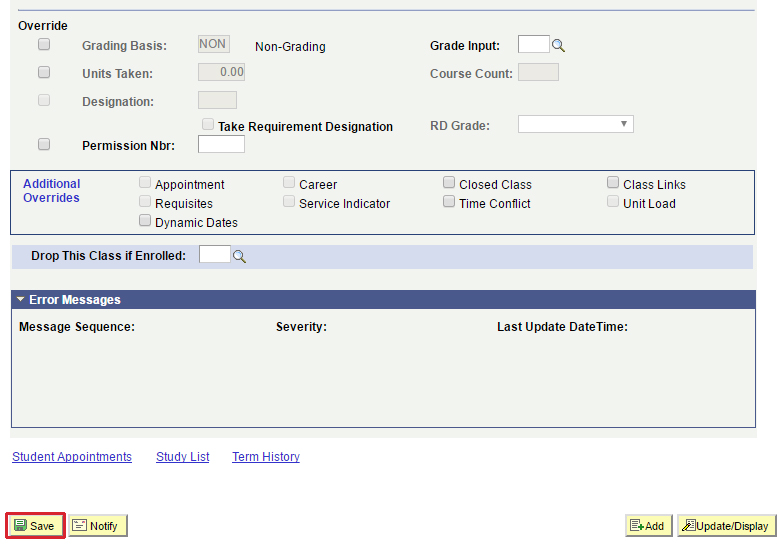
Once all the classes are added, scroll to the bottom of the page and click on the Save.
Upon saving the Enrollment Request, an Enrollment Request ID will be assigned.
Click on the Submit button to submit the Enrollment Request.
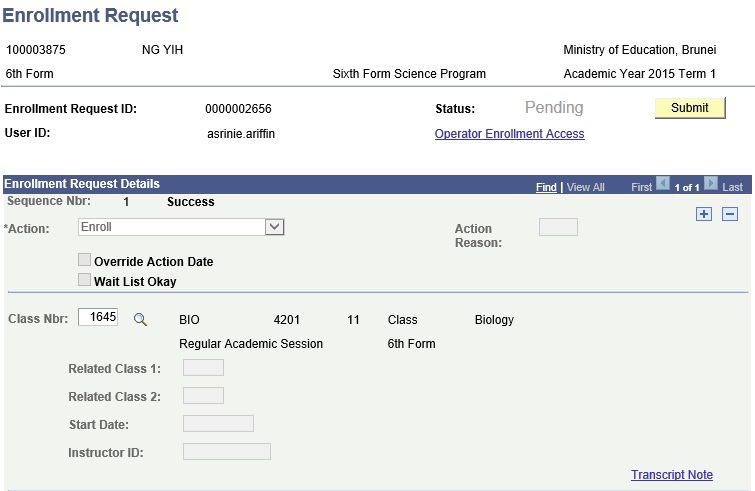
Upon submitting the Enrollment Request, the Status will be changed to ‘Success’.
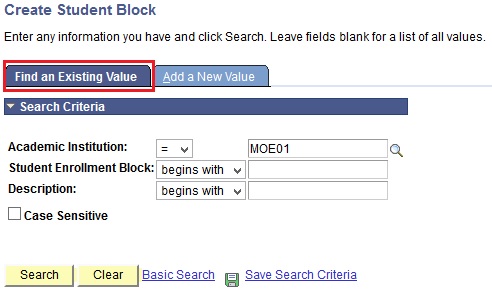
To Add the Student in the Student Block, go to Main Menu > Records and Enrollment > Enroll Students > Block Enrollment > Create Student Block.
To Find an Existing Student Block, click on the Find an Existing Value tab.
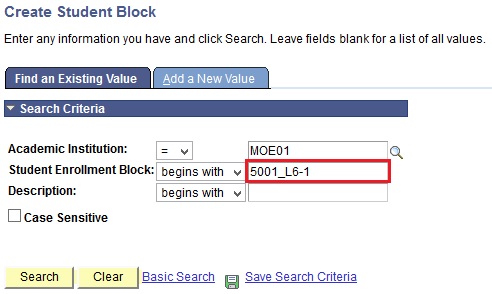
Enter the Student Enrollment Block in the Student Enrollment Block field.
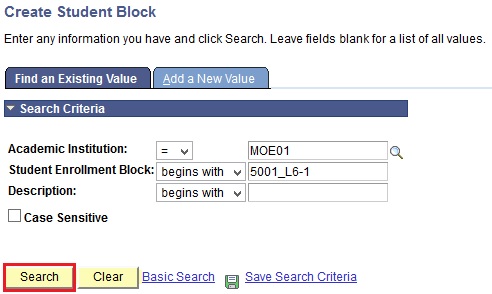
Click on the Search button.
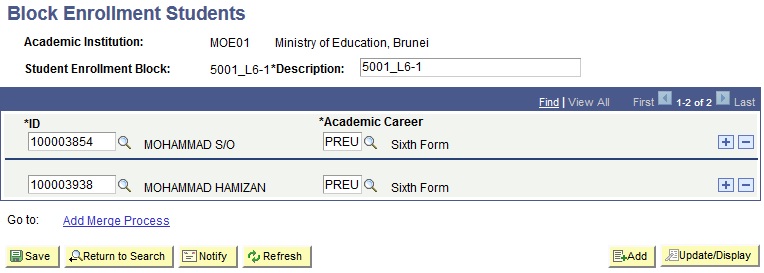
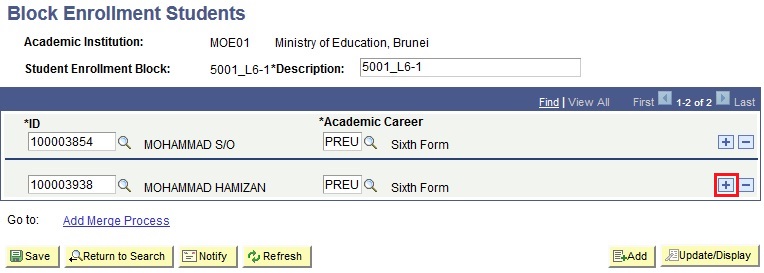
User will be directed to the Block Enrollment Student page.
Click on the ‘+’ icon to add the Student in the Student Block.
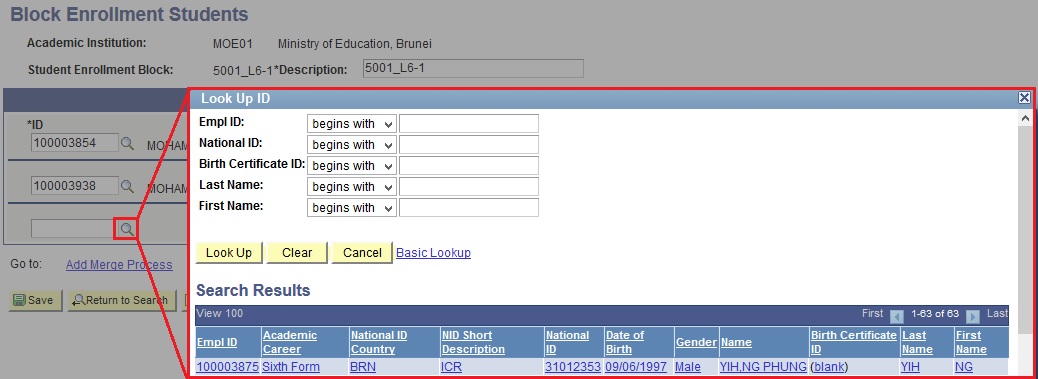
Click on the ID lookup icon to search for the Student ID of the Student.
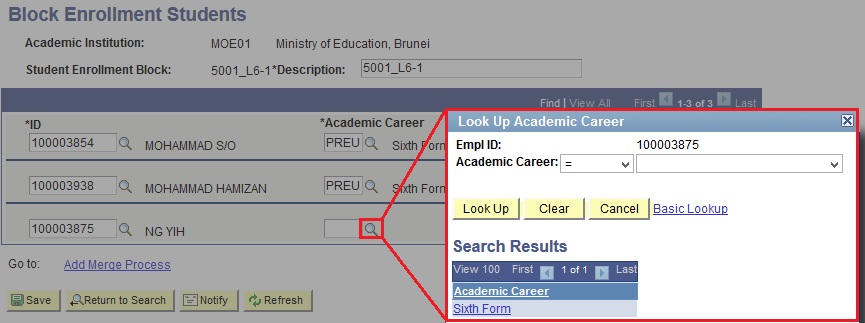
Click on the lookup icon to select the Academic Career of the student.
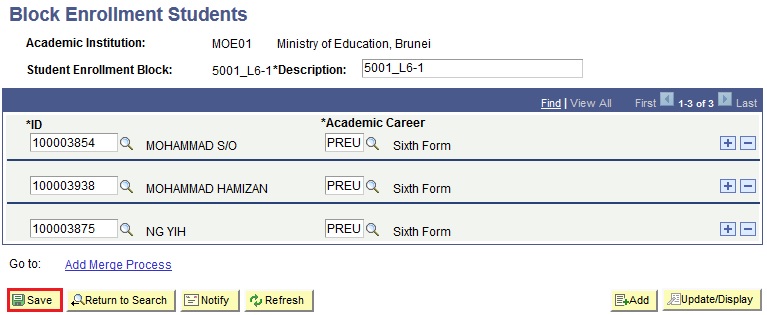
Click on the Save button to save the changes.


Note:
Repeat steps 9 to 16 for all the classes that the student should be enrolled in in the requested school/class. Every time the ‘+’ icon is clicked, the Sequence Nbr is incremented with each newly added Class Nbr.

Note:
After the Enrollment of the student is successfully submitted for the first record, the user should also enroll the Student for the CCA Career.