Reverse Posted Group
This function allows the users to Reverse Posted Group that has been created.
Group Reversal Process
Roles Involves: School Finance Officer
-
Navigate to Main Menu > Student Financials > Charges and Payments > Group Processing > Reverse Group.
-
In the Add a New Value tab, enter the required value in the Run Control ID field.
-
Click on the Add button.

-
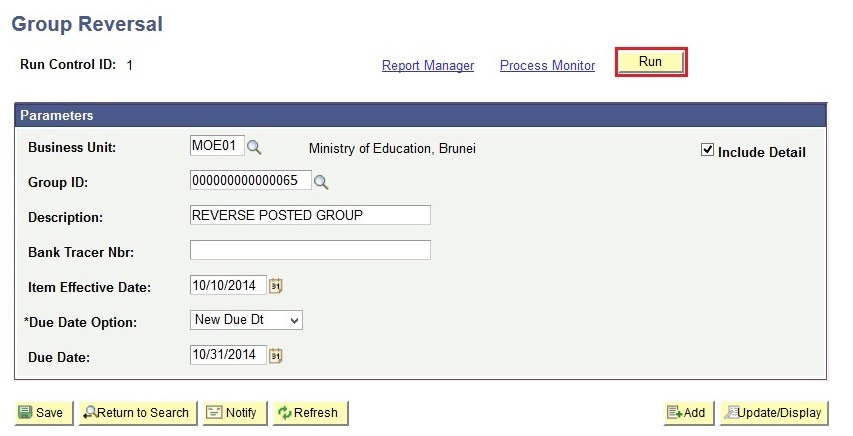
You will be directed to the Group Reversal page.
-
Enter the required values in the Business Unit, Group ID, Description and Item Effective Date fields. Select New Due Dt in the Due Date Option drop-down menu and enter the required Due Date field. Finally, tick Include Detail checkbox.
-
Click on the Run button to run the process.
-
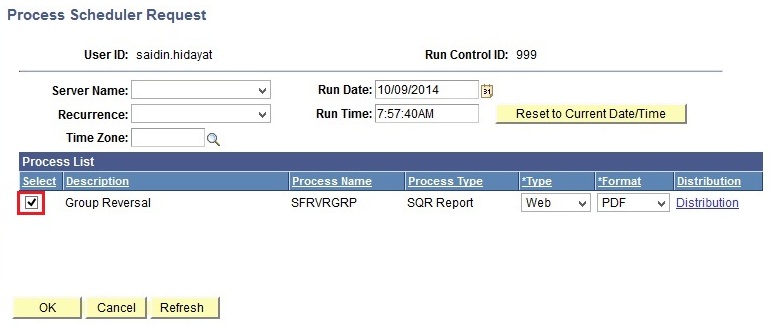
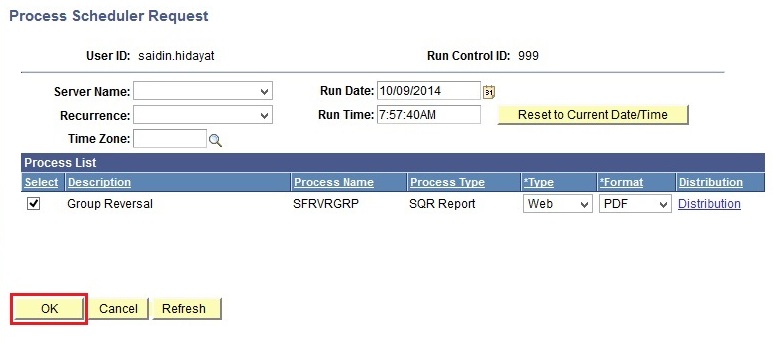
In the Process Scheduler Request page, select the Group Reversal checkbox.
-
Click on the OK button.
-
You will be directed back to the Group Reversal page. Take note of the Process Instance number.
-
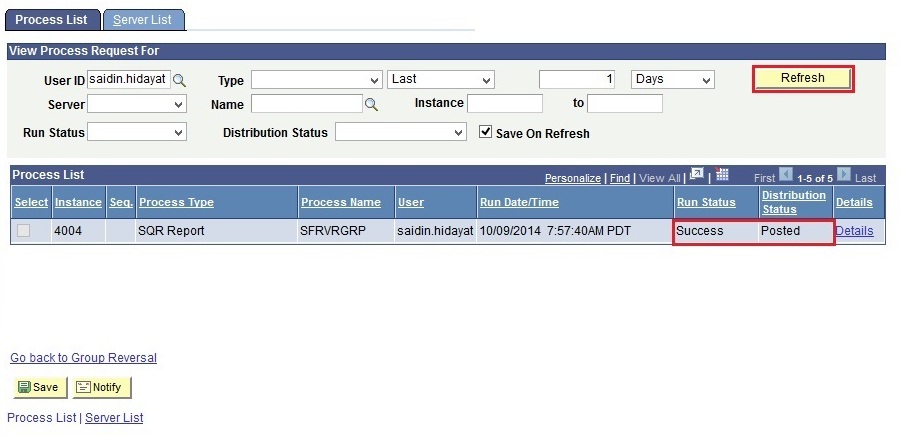
Click on the Process Monitor link.
-
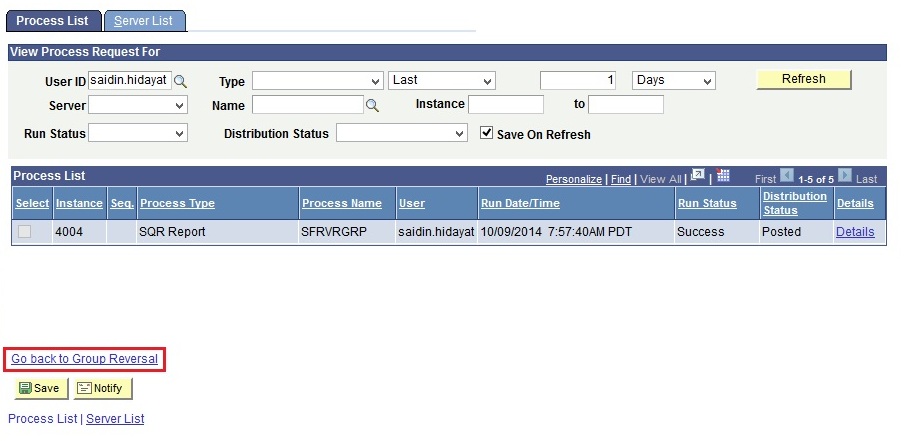
Click on the Refresh button until the Run Status and Distribution Status are set to Success and Posted.
-
Click on the Go back to Group Reversal link to go back to Group Reversal page.
-
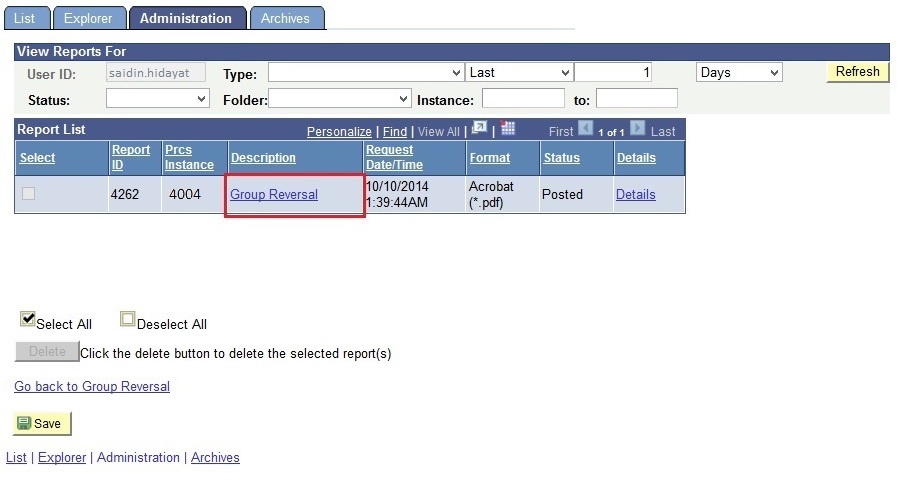
Click on the Report Manager link and it will direct you to another page.
-
Click on the Administration tab.
-
In the Report List section, click on the Group Reversal link under the Description column.
-
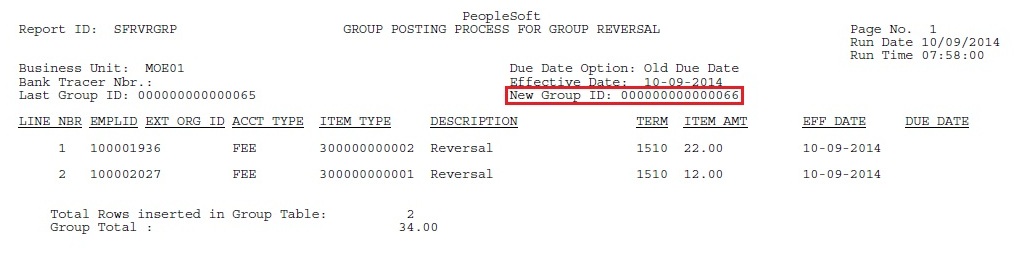
Take note of the new Group ID in the report generated.


Note: Use the Refresh button if the Due Date field takes longer to appear.


Reverse Group From Create Group Data Entries
Roles Involve: School Finance Officer
-
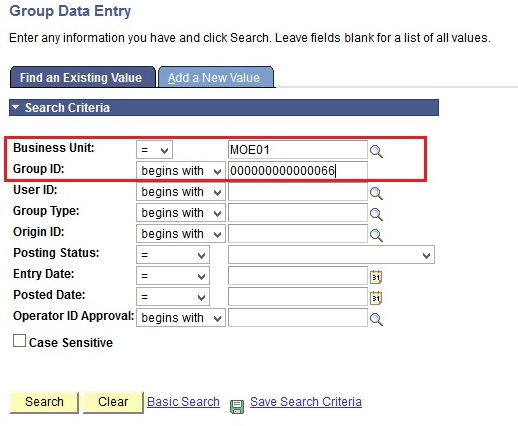
Navigate to Main Menu > Student Financials > Charges and Payments > Group Processing > Create Group Data Entries.
-
In the Find an Existing Value section, enter the required values in the Business Unit and Group ID fields.
-
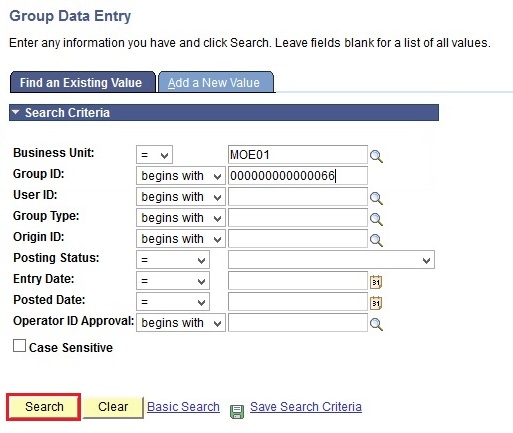
Click on the Search button.
-
You will be directed to the Create Group Data Entries page.
-
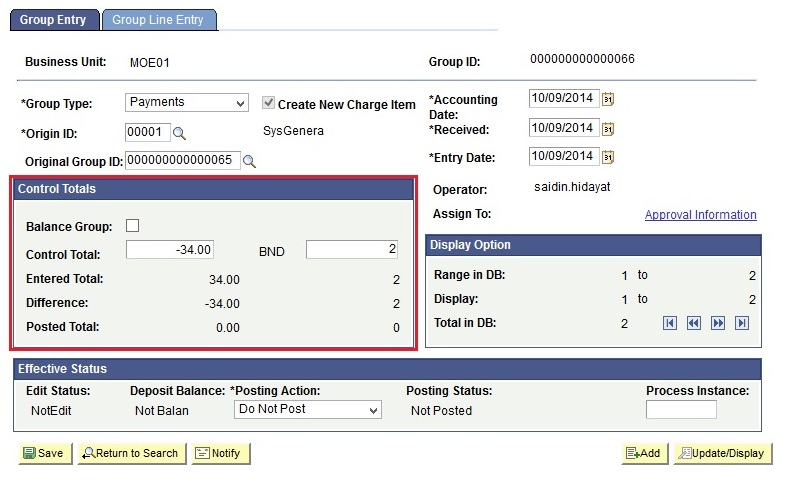
In the Control Totals section, enter the Total Amount to be reversed in the Control Total field and the Total Amount of students in the BND field.
-
Select the Balance Group checkbox to balance the Group.
-
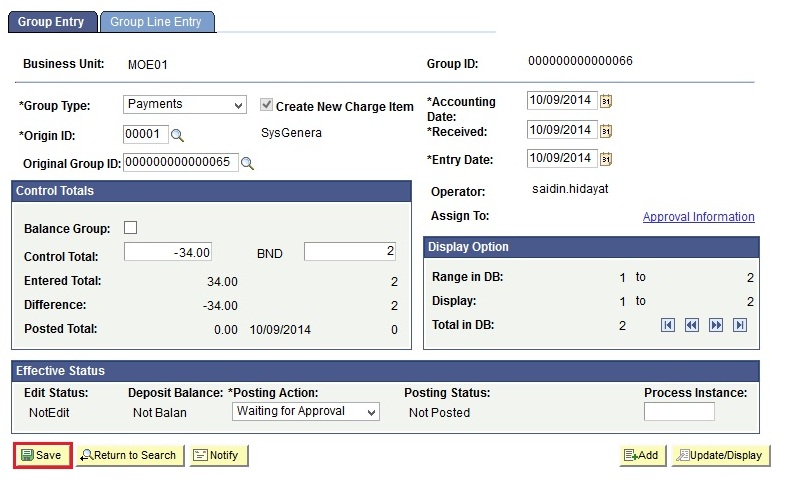
Click on the Save button to save the changes. The Group will be automatically routed for approval.
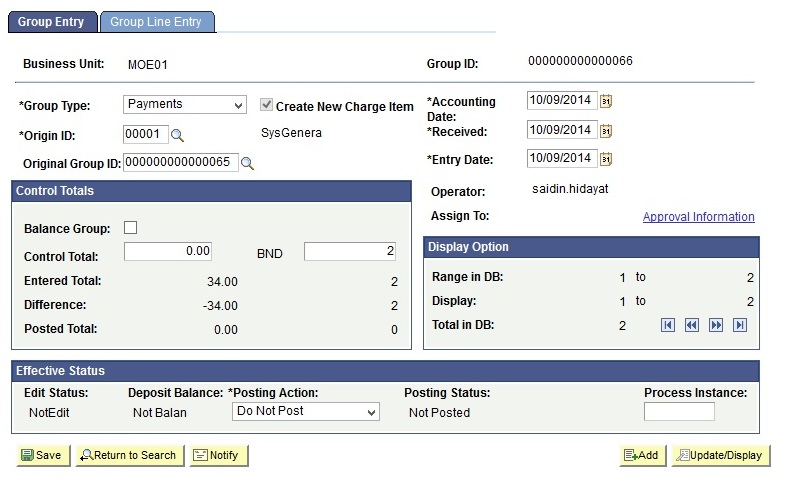
Note: Make sure the Posting Action is set to Waiting for Approval.
Approval by School Principal
Roles Involve: School Principal
-
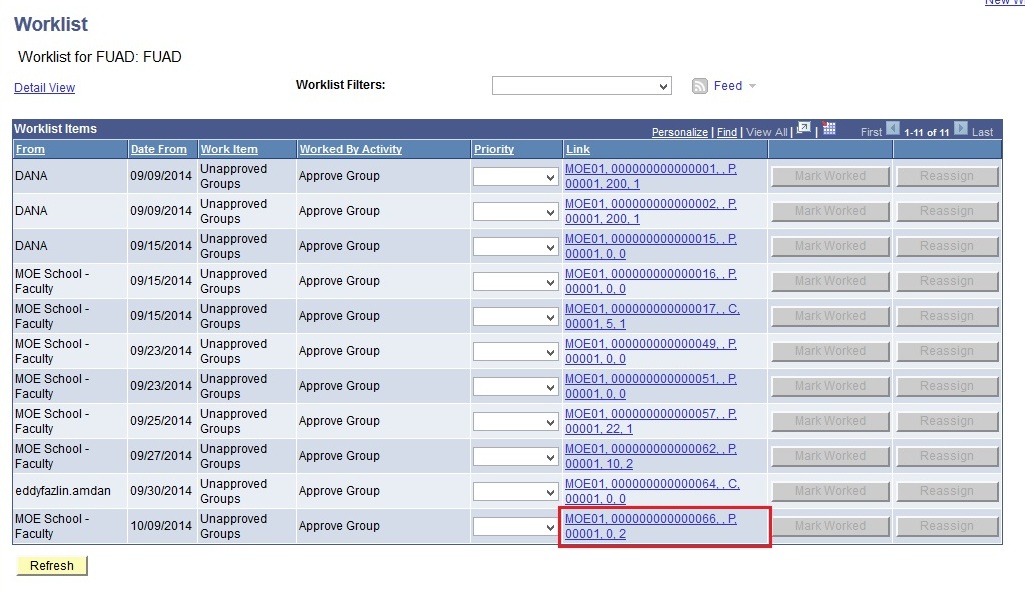
Navigate to Main Menu > Worklist.
-
Search and click on the new Group ID from the Link column.
-
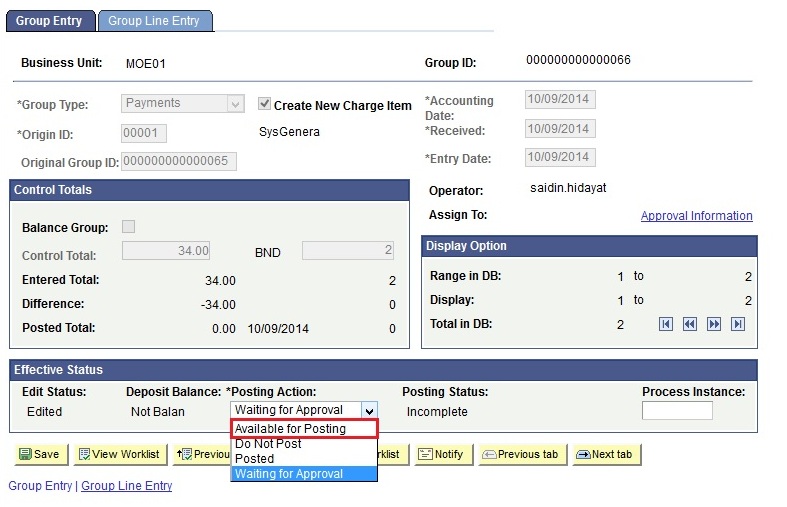
Verify the information in the Group Entry and Group Line Entry tabs.
-
To approve the group, select Available for Posting from the Posting Action drop-down menu.
-
Click on the Save button to save the changes.

Group Post
Roles Involves: Class Teacher or Finance Officer
-
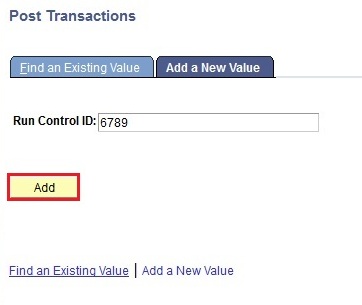
Navigate to Main Menu > Student Financials > Charges and Payments > Group Processing > Post Transactions.
-
In the Add a New Value tab, enter the required value in the Run Control ID field.
-
Click on the Add button.
-
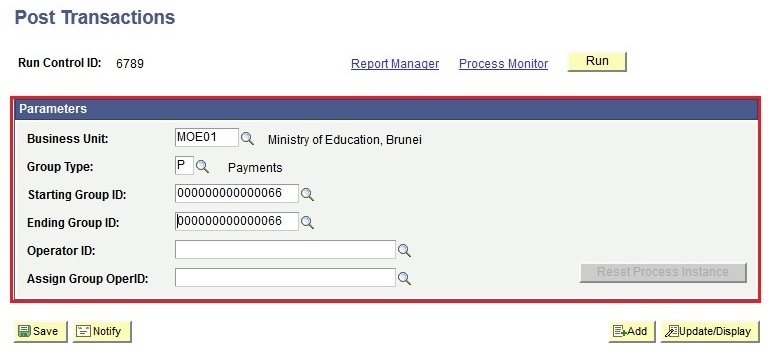
You will be directed to the Post Transactions page.
-
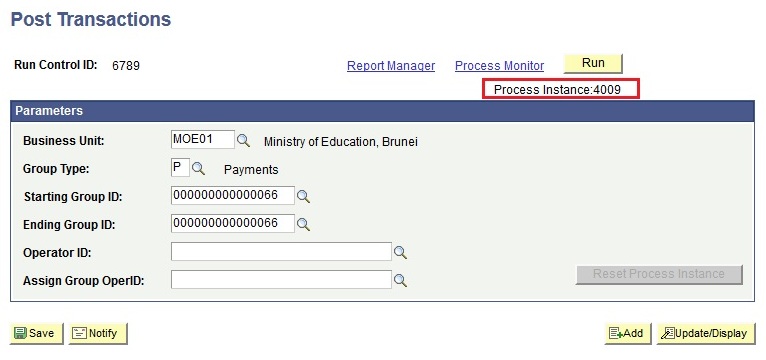
Enter the required values in the Business Unit, Group Type, Starting Group ID and Ending Group ID fields.
-
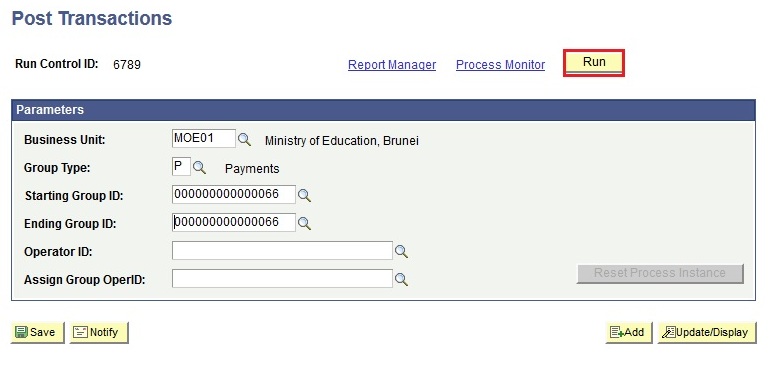
Click on the Run button.
-
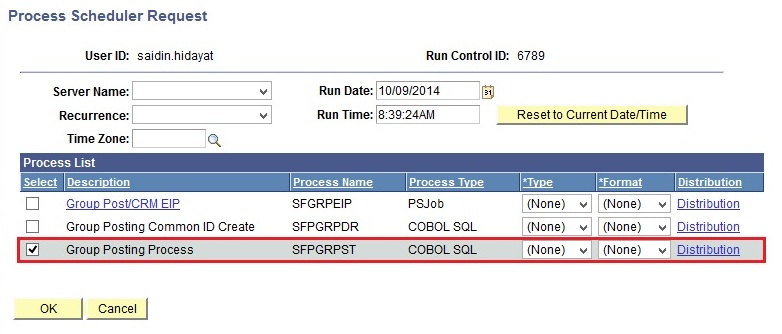
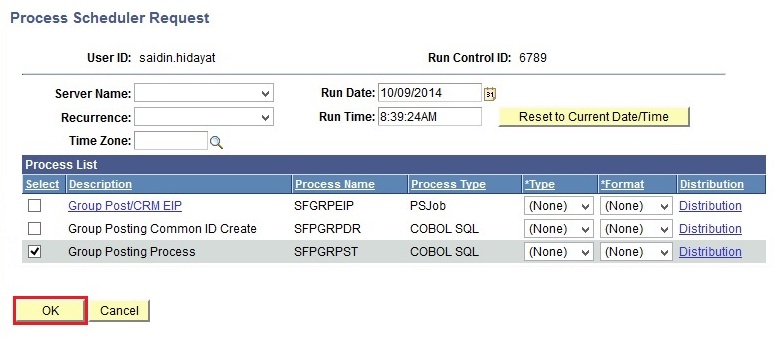
In the Process Scheduler Request page, select the Group Posting Process checkbox.
-
Click on the OK button.
-
You will be directed back to the Post Transactions page. Take note of the Process Instance number.
-
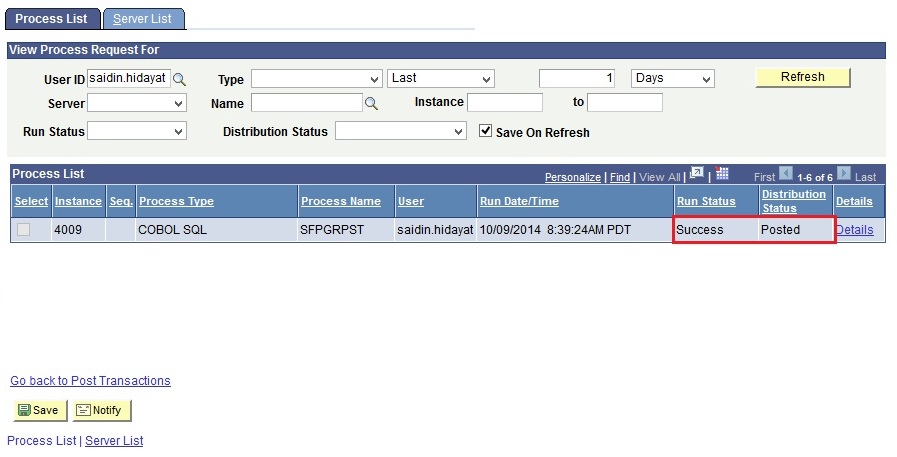
Click on the Process Monitor link.
-
Click on the Refresh button until the Run Status and Distribution Status are set to Success and Posted.
-
Once the process has completed, check for the status of the group in the Create Group Data Entries page.


Note: Make sure the Group Type is set to 'P' for Payments.

Verify in Student's Account
Roles Involves: Class Teacher or School Finance Officer
-
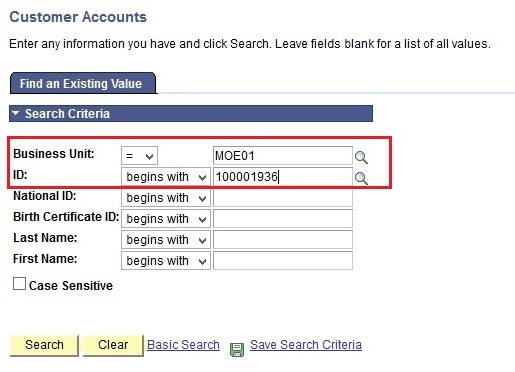
Navigate to Main Menu > Student Financials > View Customer Accounts.
-
In the Find an Existing Value tab, enter the required values in the Business Unit and ID fields.
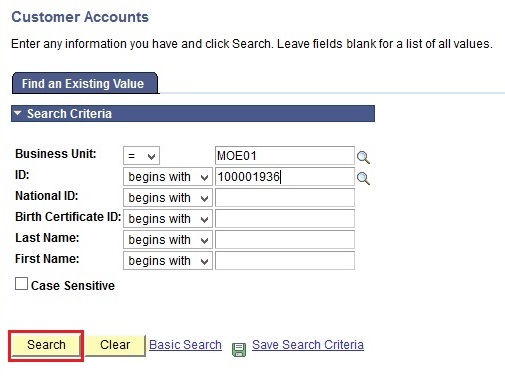
-
Click on the Search button.
-
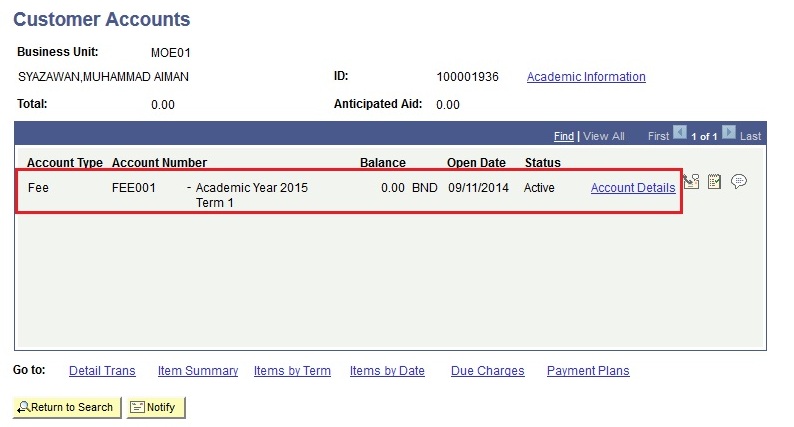
You will be directed to the Customer Accounts page.
-
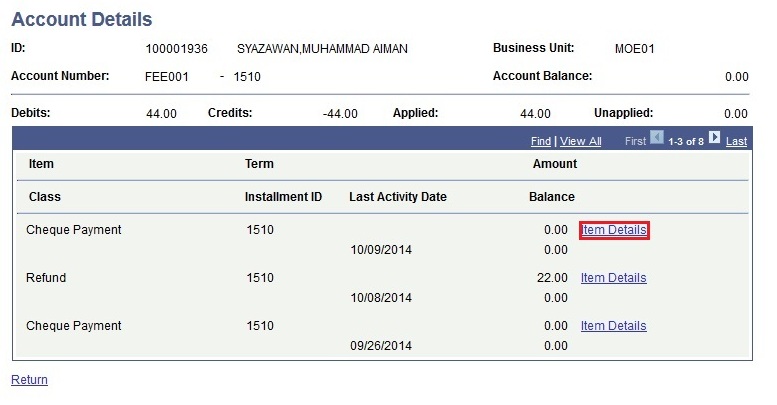
The summary of the student's balance will be display on the first page.
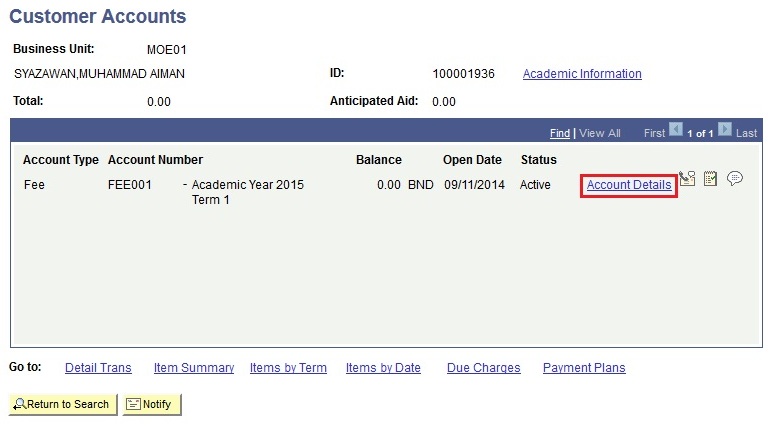
-
Click on the Account Details link to view the reversed fees' in detail.
-
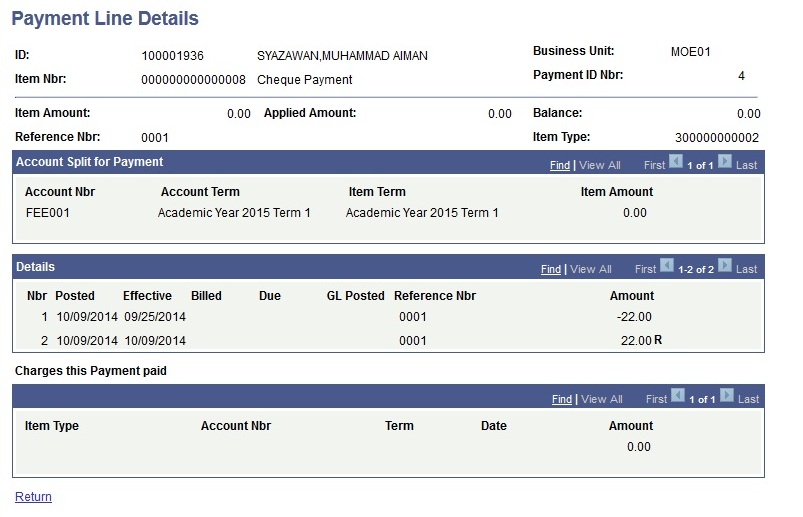
Click on the Item Details link to view the reversed fees' details.
-
This is Item Details page of the reversed fees details.